Your first day at a new job is a make or break experience. If you don’t provide your new employee with a memorable start, then how do you expect to retain them? The Onboard app, part of
Microsoft Dynamics 365 for Talent is designed to engage your employees from day one and get them set up for success within your business.
In this blog post we will be showing you step-by-step how to create an onboarding guide for your new employees. The onboarding guide is a centralised location which contains all the information, resources, contacts and activities that your employee needs when they start their new role. They are designed to minimise the administrative efforts required so those processes can be done swiftly, allowing more time for a memorable first-day experience.
1.Getting onto the Talent: Onboard application
To access the Talent: Onboard application, simply access it through the Microsoft Portal. You’ll be presented with this dashboard that looks quite empty at the moment. To start the creation of the onboarding guide click the light grey square with a cross in the middle.

2.Defining who the guide is for
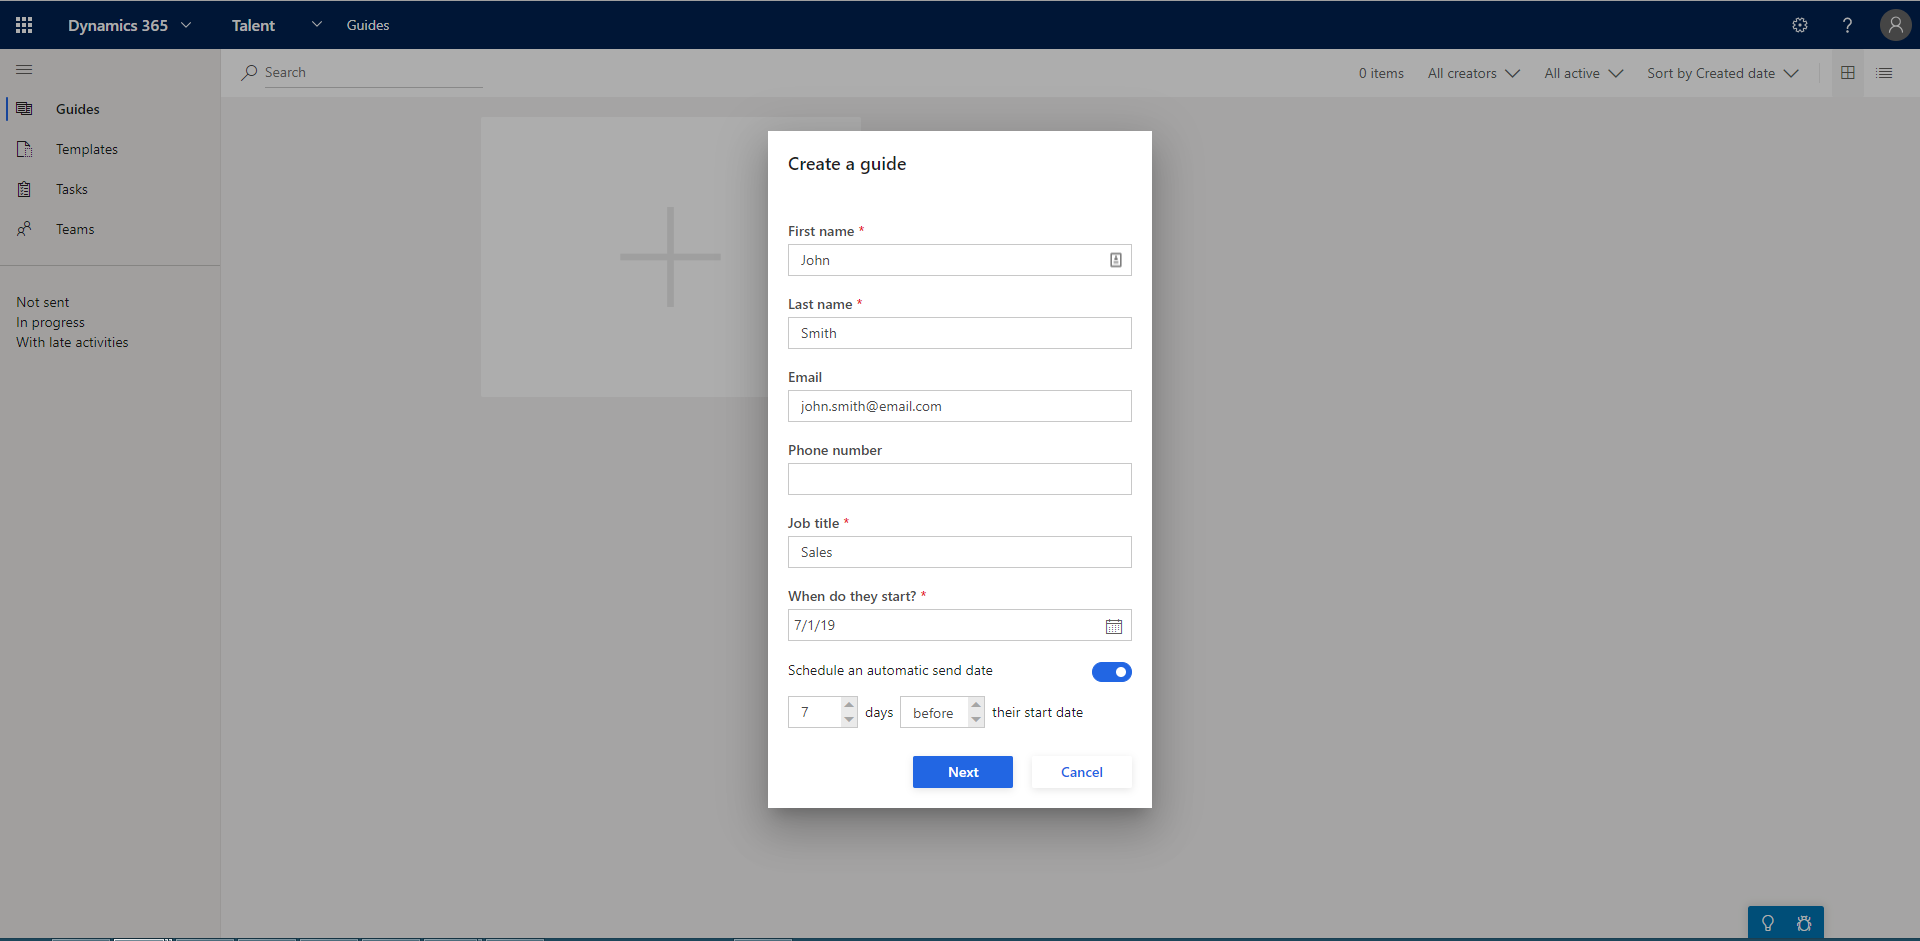
A window will pop out where you specify who the guide is for. You can add their information quickly by entering their work email, however if you haven’t created one yet then you can enter their information manually like shown in the screenshot below. You can also create the guide for multiple people at once by importing a file. You can specify when you want the guide to be automatically sent out, either before or after their start date.
3.Customising the email copy that will be sent with the guide
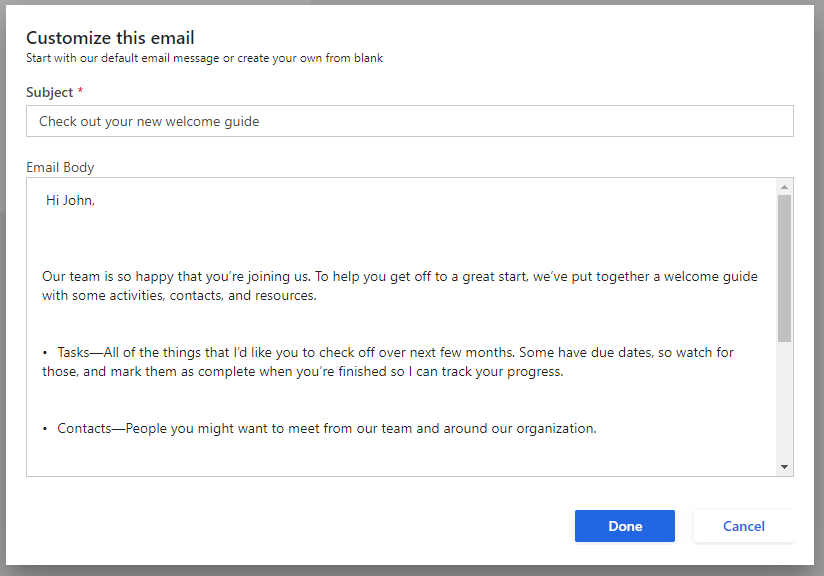
You’re then presented with a customisable email template which will be sent to your newest team member along with the guide that is being created. A standard template is provided which contains all the necessary information about what the guide is and how it works – but you’re able to change and customise it to say whatever you would like.
4. Customising the guide
After clicking done the guide will be created and appear on the dashboard, clicking on it will allow you to customise the content which is included within the guide.
Inside the guide are 4 different sections which contain different information and resources for the new employee.
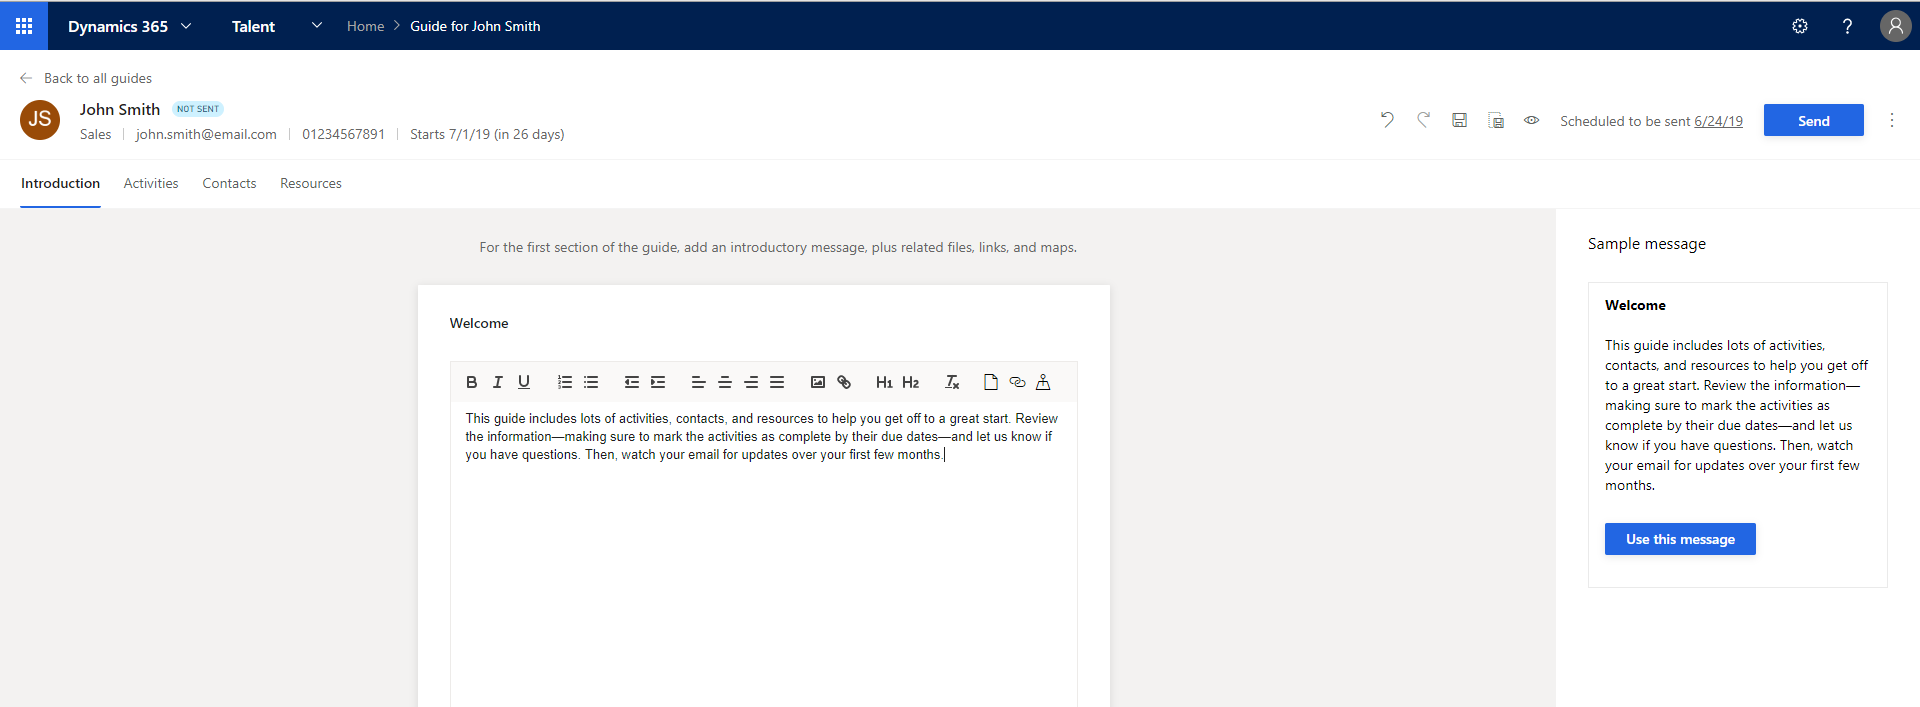
The first is the ‘introduction’. This is where you have space to write an introductory letter to your new hire. A sample message is provided but there are full customisation and formatting options available so you can customise it however you need, as well as the ability to include links, pictures and other resources.
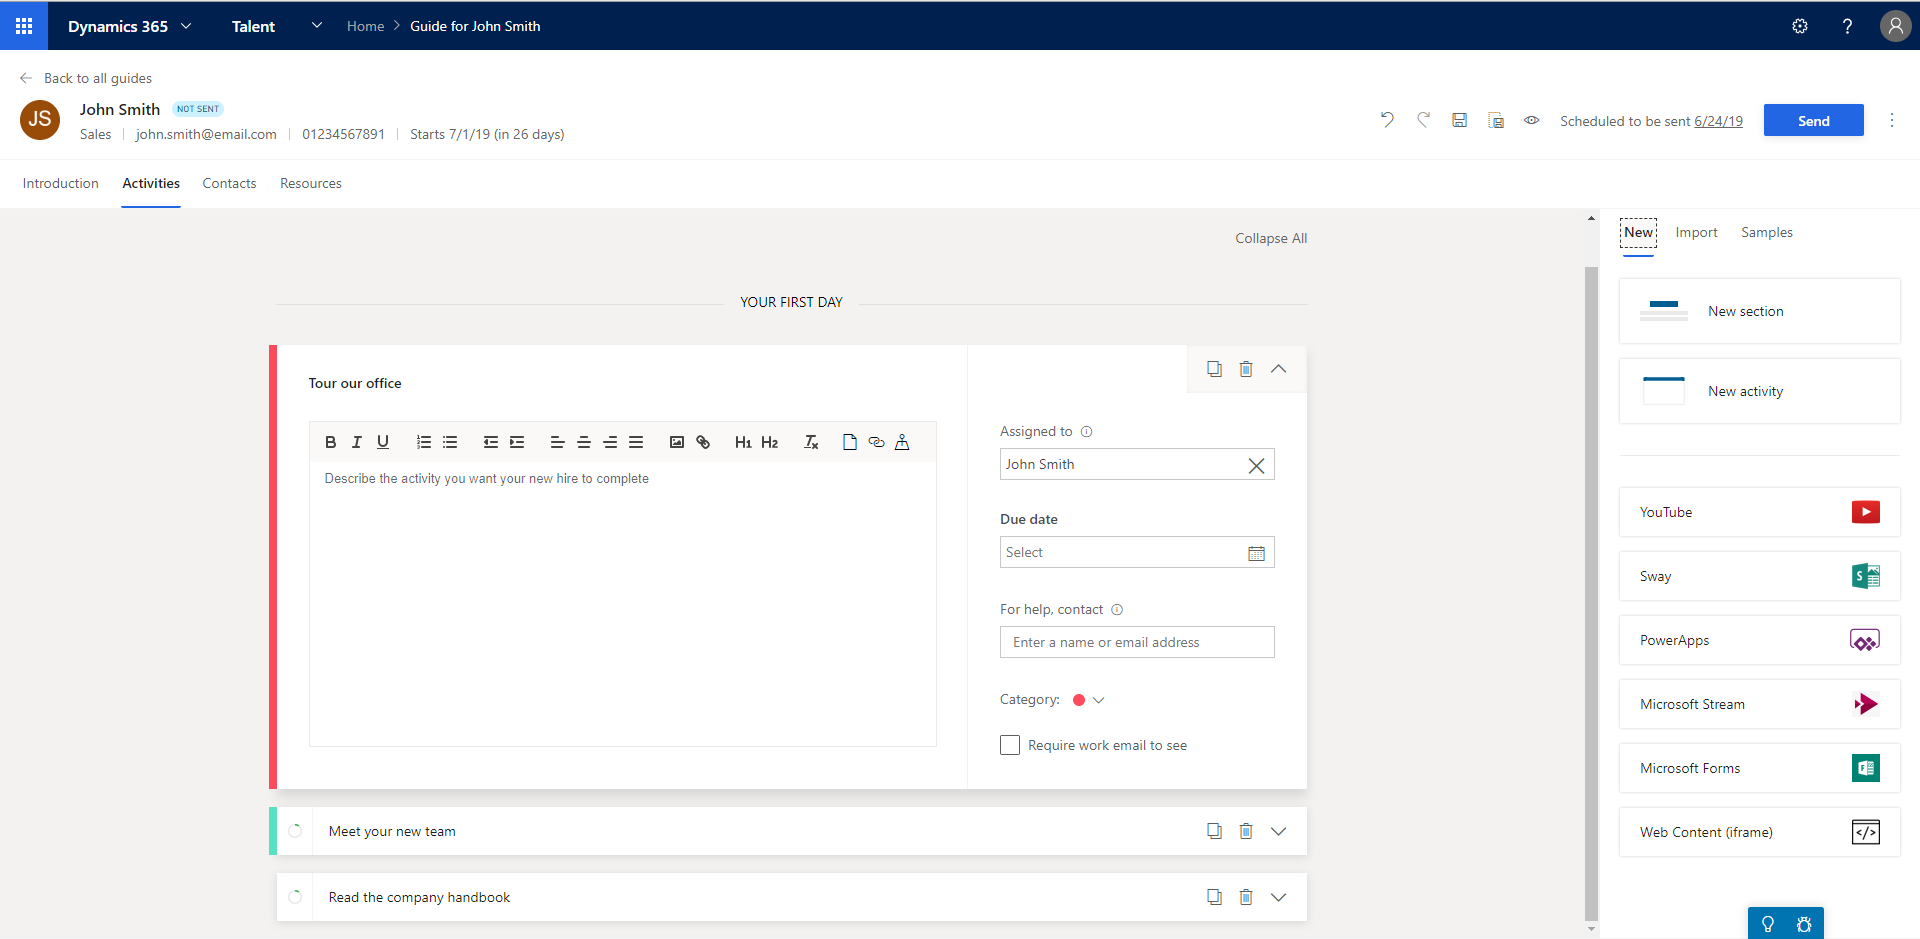
The second section is where you can define different activities for your new hire to complete through their onboarding experience. In each activity box you have a place to describe the activity, choose who it is assigned too, select a due date and also enter any contacts from the organisation who can help or be involved in the activity. You’re also able to categorise the activities with different colours, as seen in the screenshot below.
Talent provides sample activities for quick creation of the guide and you can also add elements into the activities such as YouTube Links, PowerApps, Microsoft forms and more to extend them further.
You can add as many activities as you like and group them into different sections to make it simple and easy for your new hire to understand.
The next section is where you can provide your new hire with details of the people in your organisation that they may need to contact throughout their onboarding experience. You can add them manually or suggestions will appear at the bottom of the page of people.

The final section is a space where you can upload resources for your new employee. You can add all the necessary files, links and locations into one central location making it easy for your employee to have everything they need to get up and running straight away.
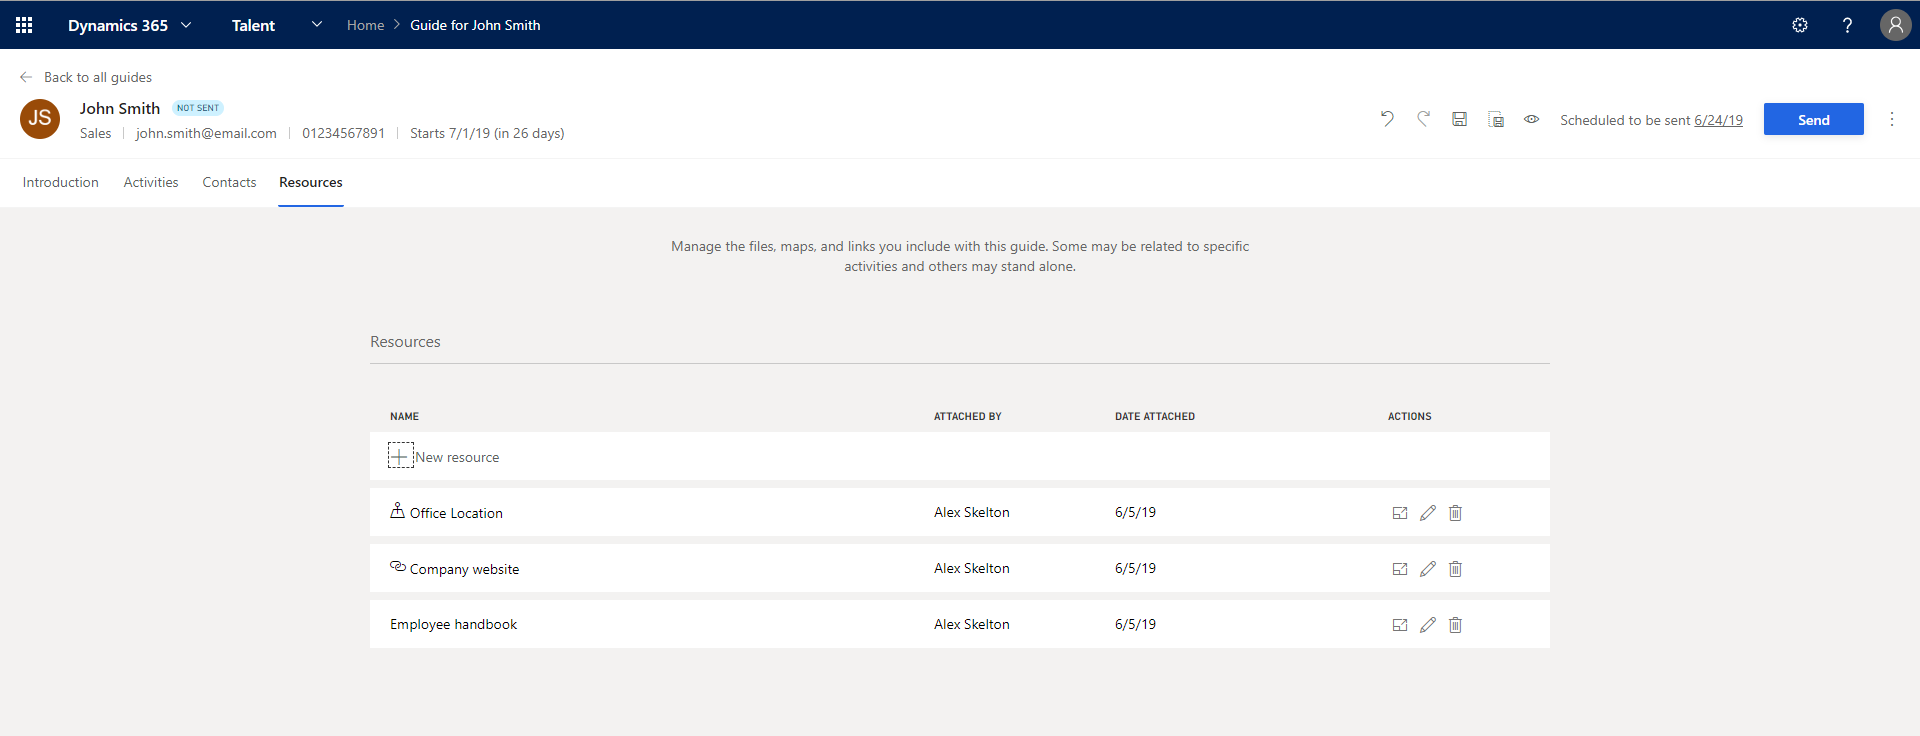
And that’s it, your guide is now complete and ready to send off to your new hire so they can be fully prepared before starting and have a successful onboarding experience.
5. Previewing the guide
Before it is sent off however, you’re able to preview the guide before it is sent out to see what it looks like from your new employees perspective.
As shown in the GIF below, the guide is nicely laid out and makes it simple for them to find all the information & resources, as well as viewing each of the activities that have been set and marking them off as they are completed.
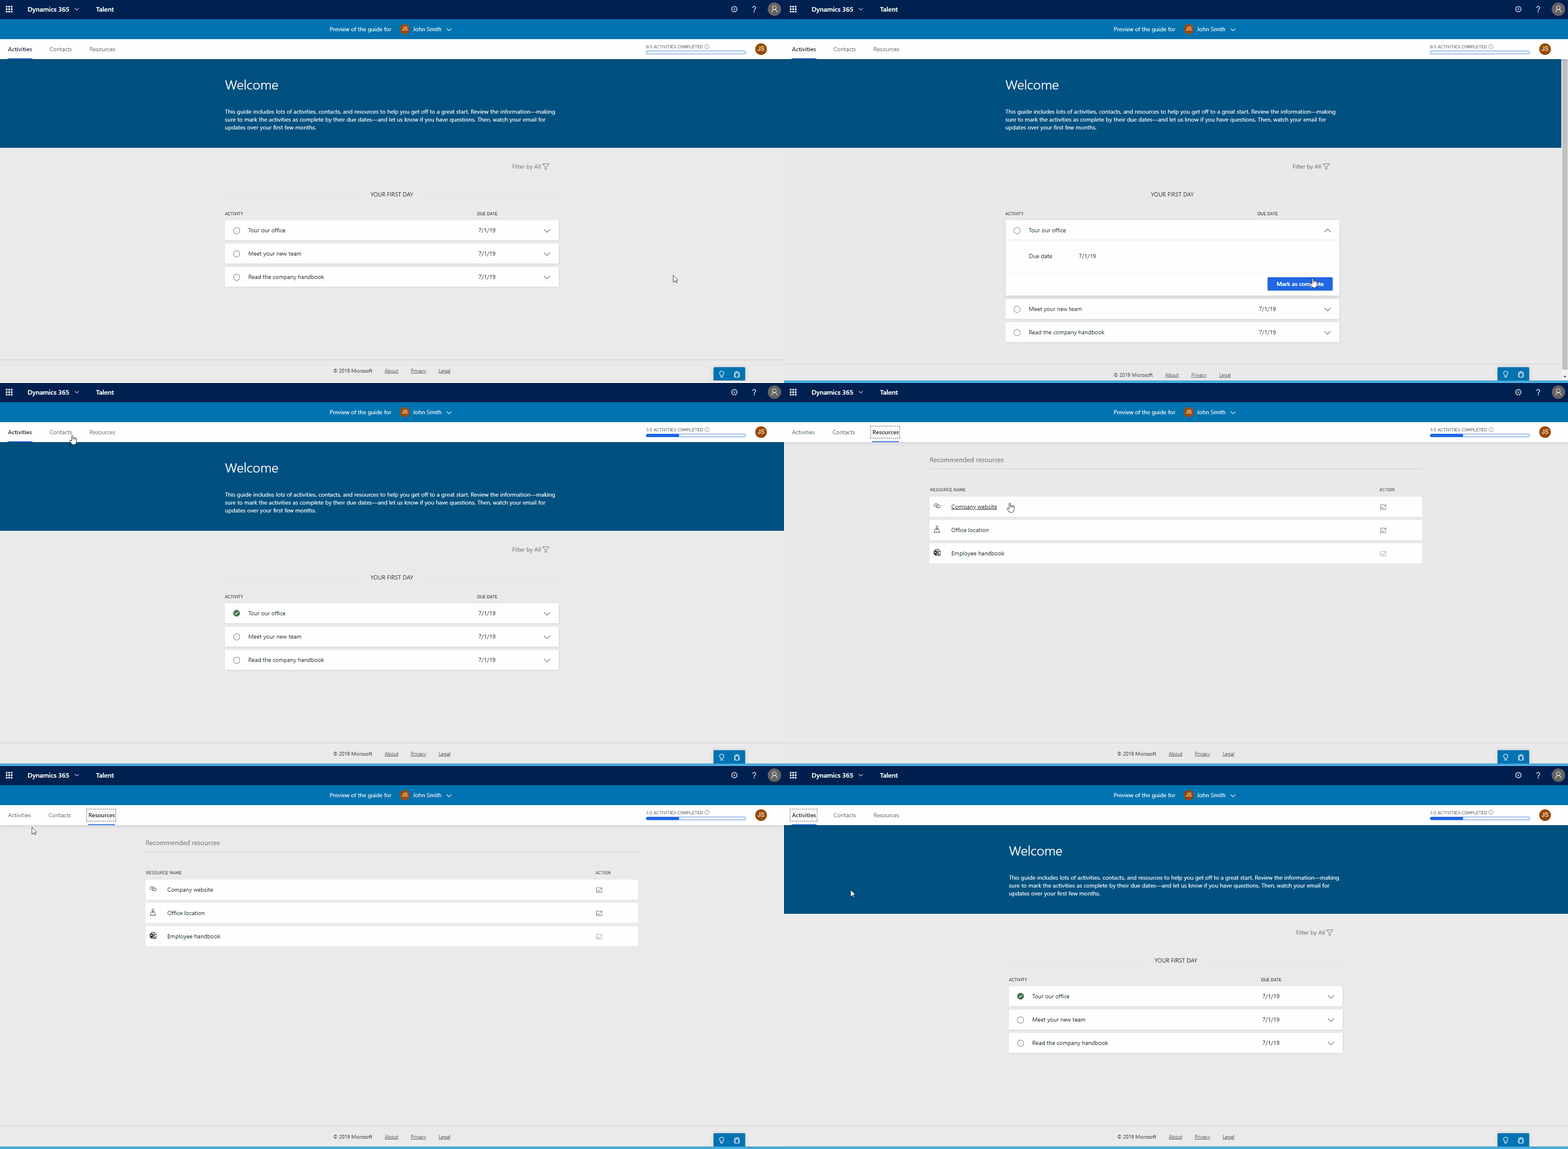
Once you’ve previewed it and you’re happy, go to the right-hand corner and press send. You then have another chance to edit the email which the guide is sent along with, then you can send it off to your newest employee.
From this blog post you have seen how quick and easy it is to create onboarding guides in
Dynamics 365 for Talent. You’re even able to save your guides as templates, making the whole process even quicker for when you’re onboarding your next employee.
Using Talent’s onboarding guides allow you to get all the tedious administrative tasks out the way allowing you to spend more time engaging with your new hire and providing them with a memorable first-day experience.
If you would like to learn more about what you can do in Microsoft Dynamics 365 for Talent you can visit our other
blog posts,
web page or
videos. Alternatively, you can contact us on
01908508080 or
[email protected] for a no-obligation chat about the solution.


 The second section is where you can define different activities for your new hire to complete through their onboarding experience. In each activity box you have a place to describe the activity, choose who it is assigned too, select a due date and also enter any contacts from the organisation who can help or be involved in the activity. You’re also able to categorise the activities with different colours, as seen in the screenshot below.
Talent provides sample activities for quick creation of the guide and you can also add elements into the activities such as YouTube Links, PowerApps, Microsoft forms and more to extend them further.
You can add as many activities as you like and group them into different sections to make it simple and easy for your new hire to understand.
 The next section is where you can provide your new hire with details of the people in your organisation that they may need to contact throughout their onboarding experience. You can add them manually or suggestions will appear at the bottom of the page of people.
 The final section is a space where you can upload resources for your new employee. You can add all the necessary files, links and locations into one central location making it easy for your employee to have everything they need to get up and running straight away.
 And that’s it, your guide is now complete and ready to send off to your new hire so they can be fully prepared before starting and have a successful onboarding experience.
 Once you’ve previewed it and you’re happy, go to the right-hand corner and press send. You then have another chance to edit the email which the guide is sent along with, then you can send it off to your newest employee.
From this blog post you have seen how quick and easy it is to create onboarding guides in Dynamics 365 for Talent. You’re even able to save your guides as templates, making the whole process even quicker for when you’re onboarding your next employee.
Using Talent’s onboarding guides allow you to get all the tedious administrative tasks out the way allowing you to spend more time engaging with your new hire and providing them with a memorable first-day experience.
If you would like to learn more about what you can do in Microsoft Dynamics 365 for Talent you can visit our other blog posts, web page or videos. Alternatively, you can contact us on 01908508080 or [email protected] for a no-obligation chat about the solution.
