(If this is your first time exploring the Talent platform and would like to know more about it before reading this blog post, please visit our application web page or other blog posts about the application.)
Microsoft Dynamics 365 for Talent is one module of the Dynamics 365 suite. It has been developed to bring all your HR & recruitment processes into one easy-to-use platform to help you streamline your processes and empower your HR team with the tools they need to attract, hire, onboard and retain the best people.
In this blog post we will be exploring the entire process of taking a candidate from applying for a job application that was created in Talent, then screening their application, scheduling an interview and creating an offer package for a new hire.
(This blog post is also available as a video)
1.Candidate: Applying for the job
The first step to get this process underway is getting the candidate to apply for the job. The screenshot below shows a job application that we created in a previous video/blog post.
When applying for the job candidates will be asked to fill out various details including previous work experience and education, as well as uploading any documents (CV, Cover letter, etc).
Once this has been done, the process can move forward from the recruiter.
2.(Recruiter): Screening application
When on the ‘jobs’ tab inside Talent: Attract, you will see your job listings there and whether you have any applicants. When clicking into the specific job listing, you’ll see the name of the candidate appear – like in the screenshot below.
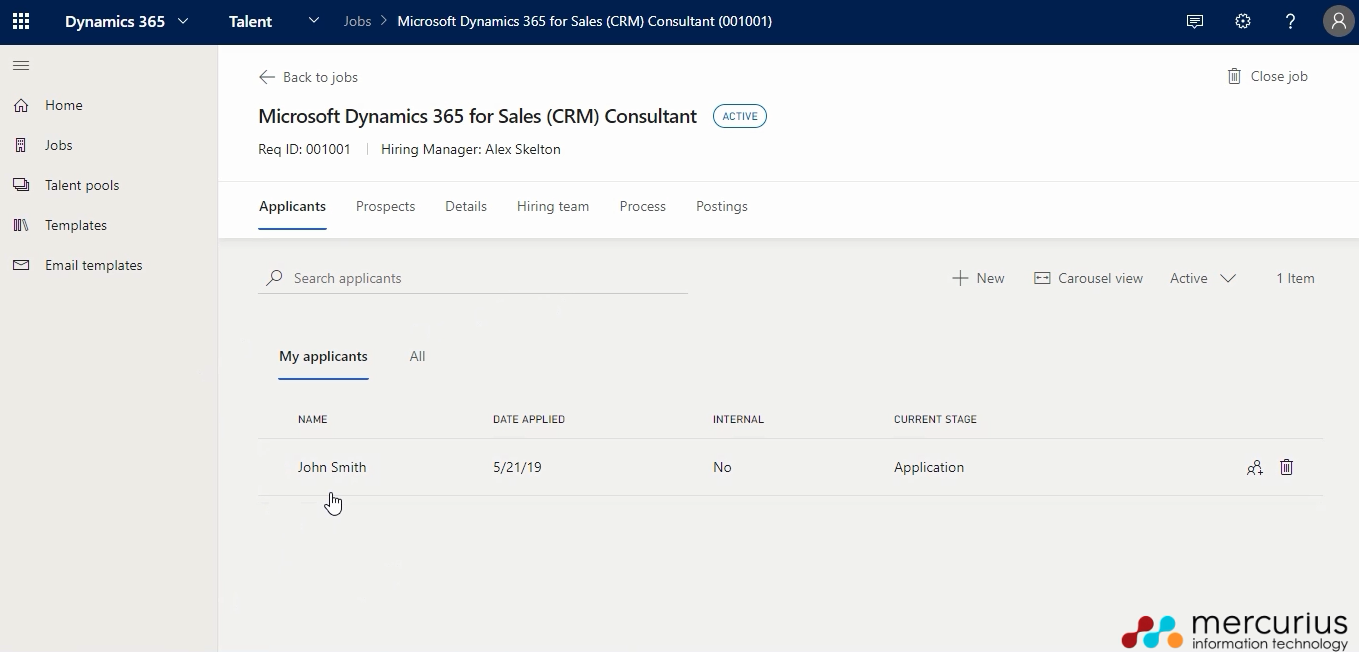
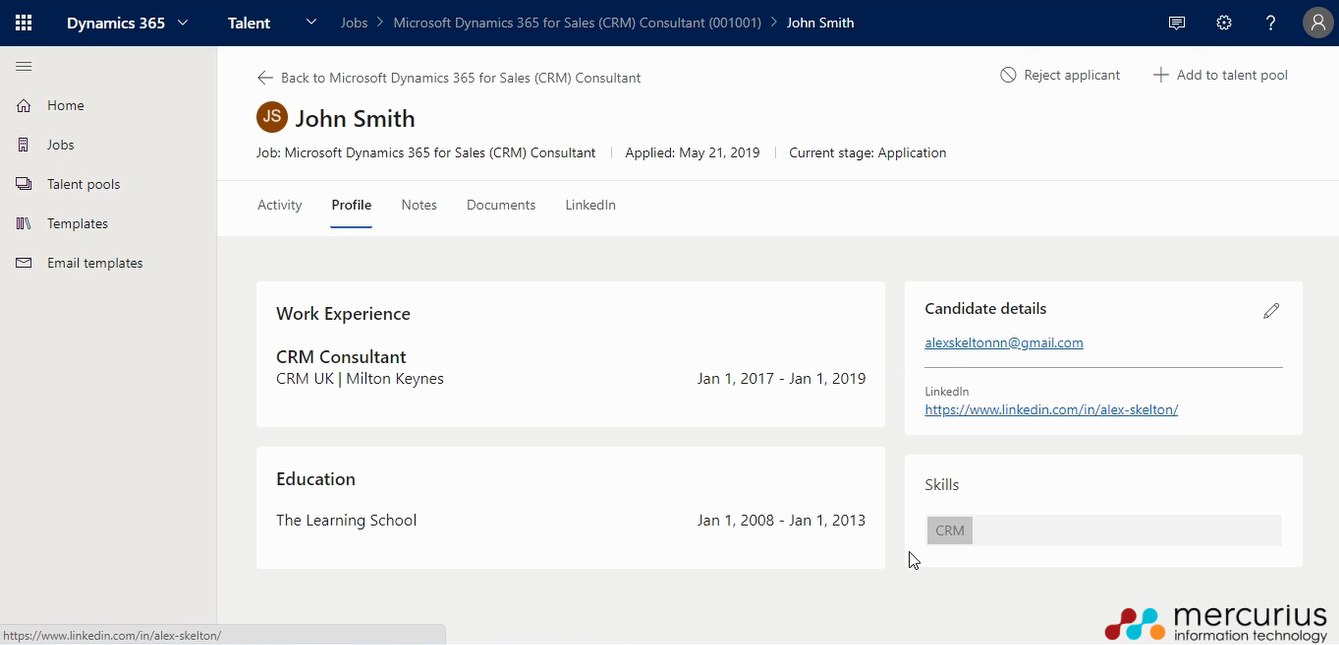
After clicking into the individual applicant, you can screen over their details in depth to get a better understanding of the person. Inside the applicants’ profile there are 5 tabs which contain different information:
- Activity – Displays their progress through the set stages of the job application.
- Profile – Contains the candidates work experience, education, details & skills.
- Notes – A place for members of the hiring team to make notes on candidates, to ensure transparency & nothing is missed by members of your team.
- Documentation – Where the candidates uploaded documents are kept.
- LinkedIn – When clicked on, this tab displays the candidates LinkedIn profile directly in the Talent application, meaning you don’t have to click out the application to do so.
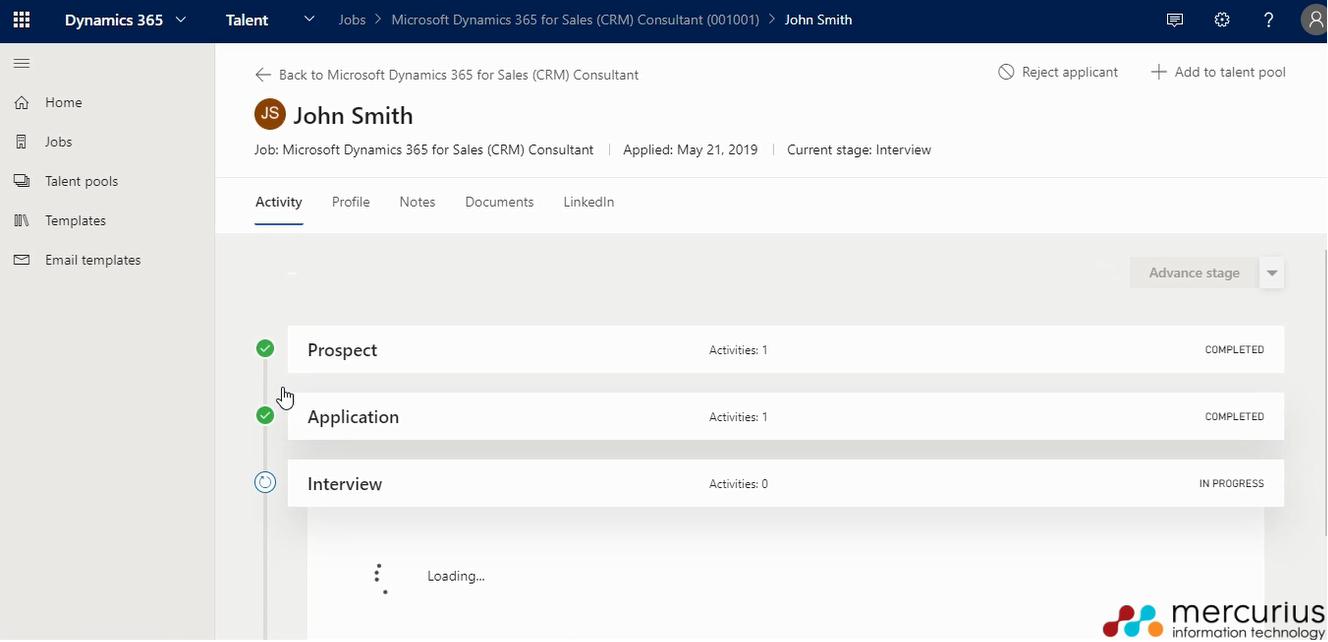
Now the applicant has been screened over and the recruitment team have decided that they want to invite them in for an interview, you can advance the stage on the activity tab, which will take them from the application stage to the interview stage. If you have set your job application process up differently, there may be another step in between the application and interview – for a phone interview for example. However this is a simple 4 step process job interview that was created here.
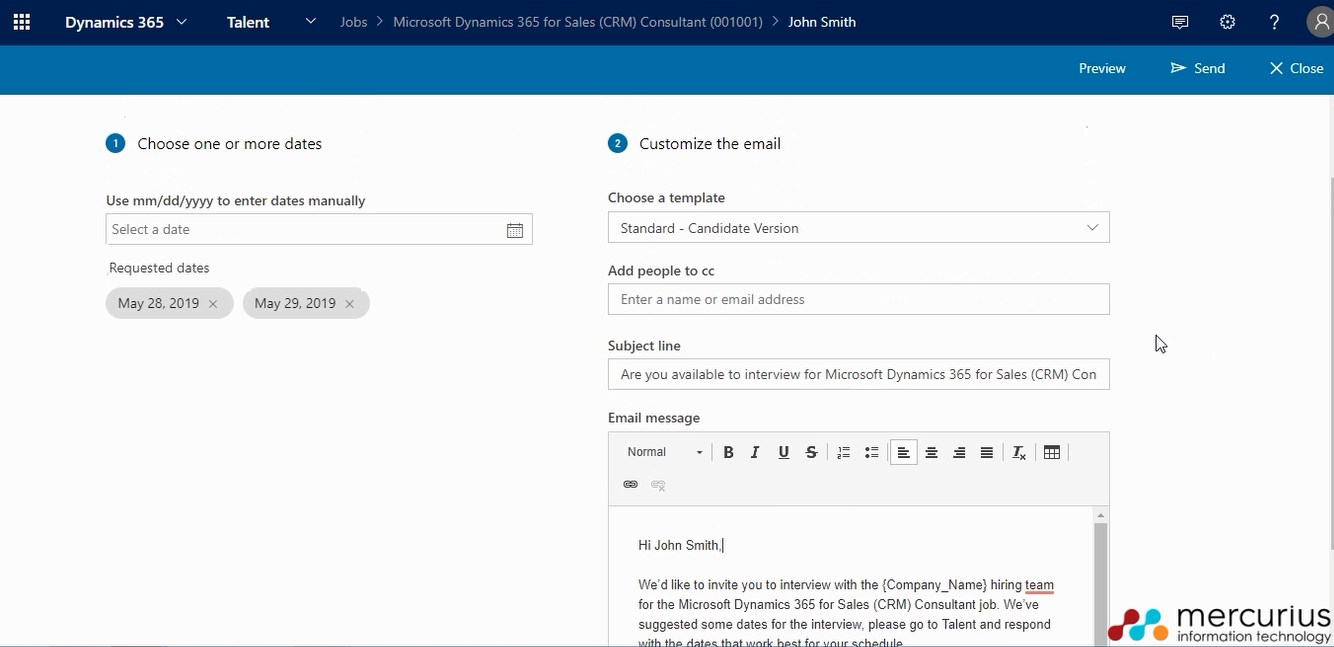
The next step is to send over a couple of dates to the candidate to see when they are available for an interview. After clicking ‘send request’ a new screen appears where you can select dates from a calendar which you’ll send to the client to see which one works best for them. An email template is automatically generated to send this over to the candidate, Talent automatically provides one template for you which works well, however this is fully customisable and you can create your own templates to use.
4.(Candidate): Confirming a date
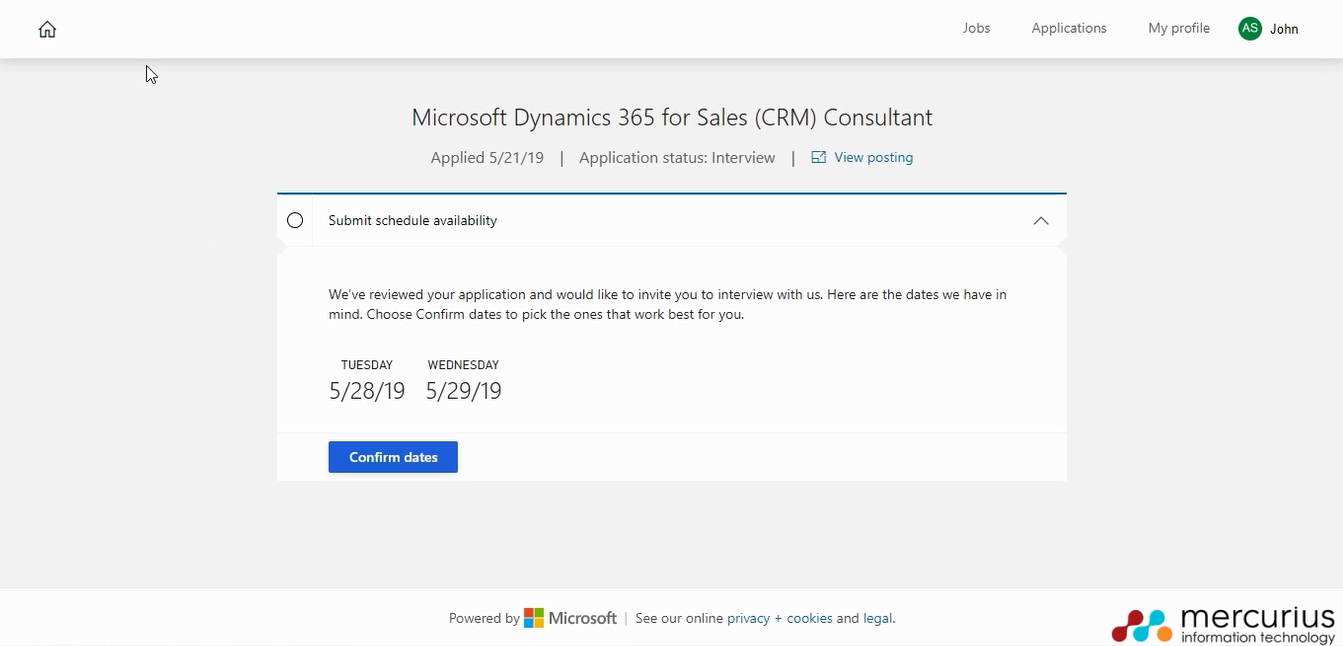
The candidate would then receive the email and click the link to lead them to the page which is shown in the screenshot below. They can select which date works best for them and send the information back to the recruiter.
5.(Recruiter) Schedule interview time
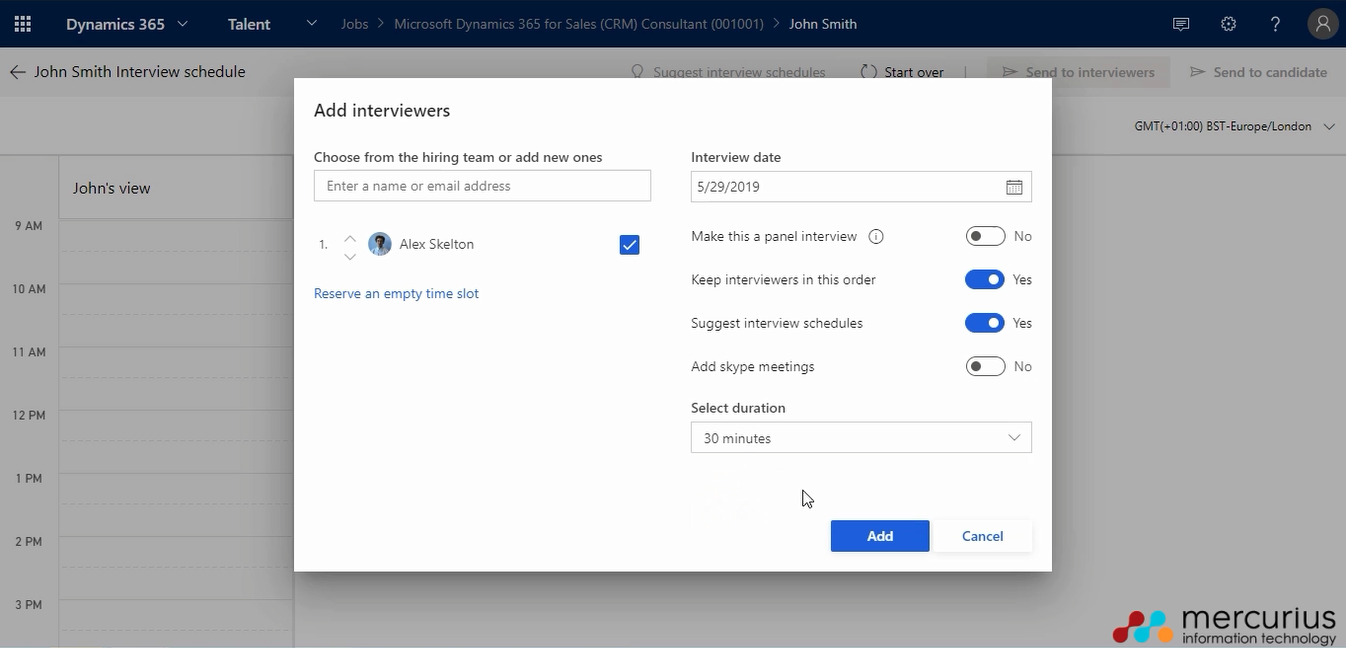
Now that the candidate is available for one of the days that were sent over, a time in the day can be selected for the interview. Clicking the ‘create schedule’ button will take you to the screen which is pictured below.
In the screen you have the ability to add and select interviewers. If you had multiple people involved in the job application then they would automatically appear here – however if you didn’t, you still have the ability to add extra people here who would be involved in the interview. If you are having multiple interviewers, you are able to have it as multiple staggered interviews after each other or alternatively, you can make it a panel interview.
There are also other options for having the interview as a Skype meeting and also changing the duration of the interview. Additionally, you can have the application suggest the interview schedule for you to save time and ensure there is no overlap with other appointments.
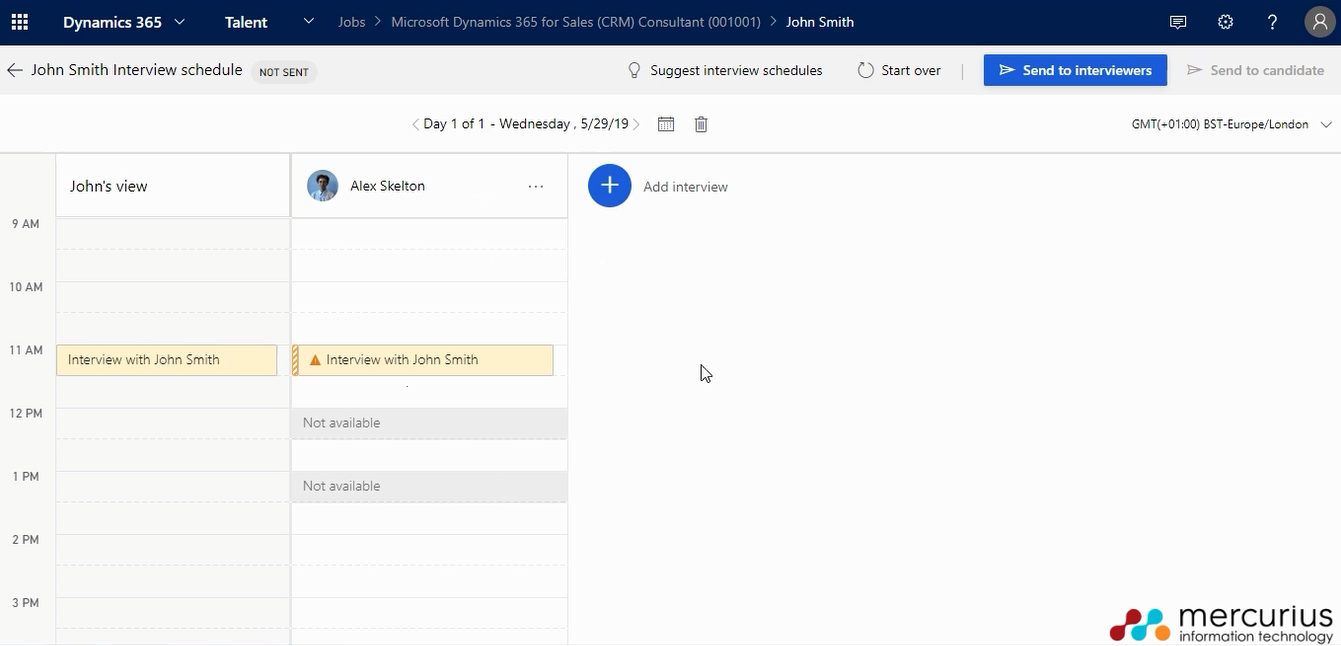
After clicking add, you’ll be shown an hour calendar view of how the interview will be scheduled. You’re able to move this around as you wish and if you have multiple people involved in the interview this is extremely useful as you can easily see when people are available as the calendar will be marked when pre-booked appointments are in people’s calendars. On the left-hand column it shows the candidate view for the interviews – when having multiple interviews they would all show their timings in order. Once it has been scheduled correctly you can send it off to the interviewers for their review.
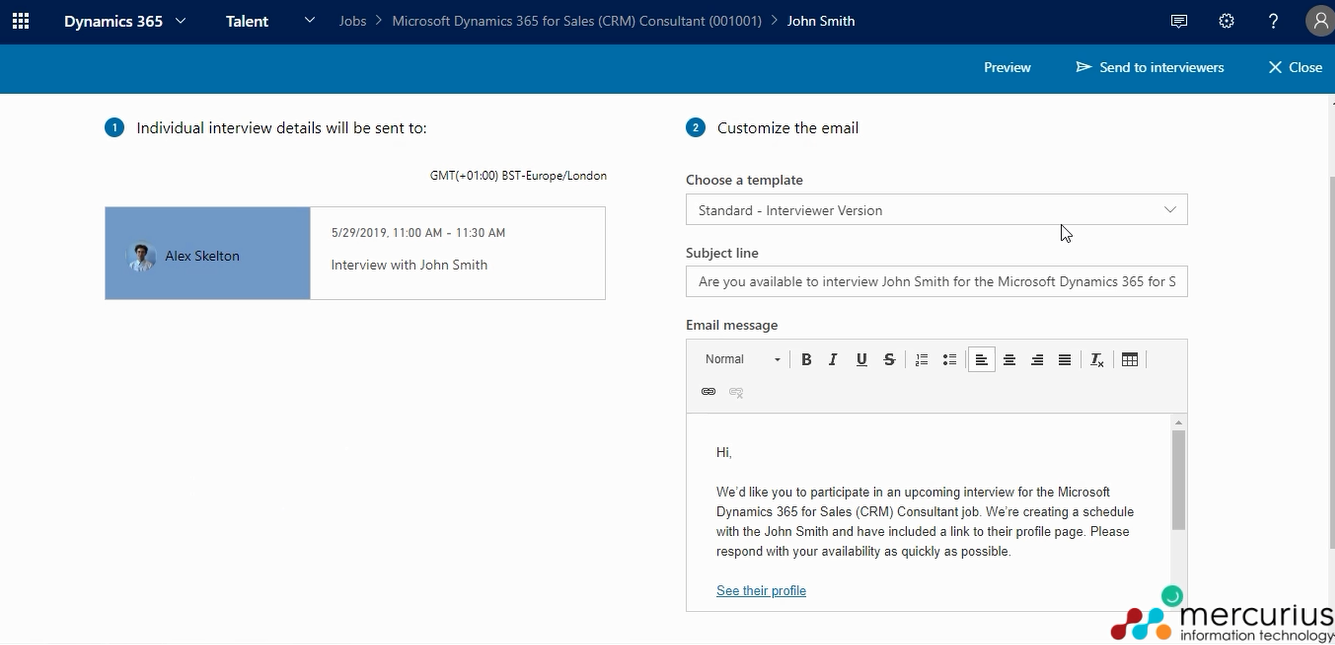
To inform the interviewers about the timings, another email will be sent. Once again, there is an email template provided for you but is still fully customisable and you are able to save your own templates to replace this. This email will be sent to the interviewers as a meeting in Outlook, allowing them to accept or decline it. After sending the email you will be taken back to the candidate profile and it will show that you’re awaiting a response from the interviewer(s).
After the interview time has been accepted by the interviewer the details can be sent over to the candidate.
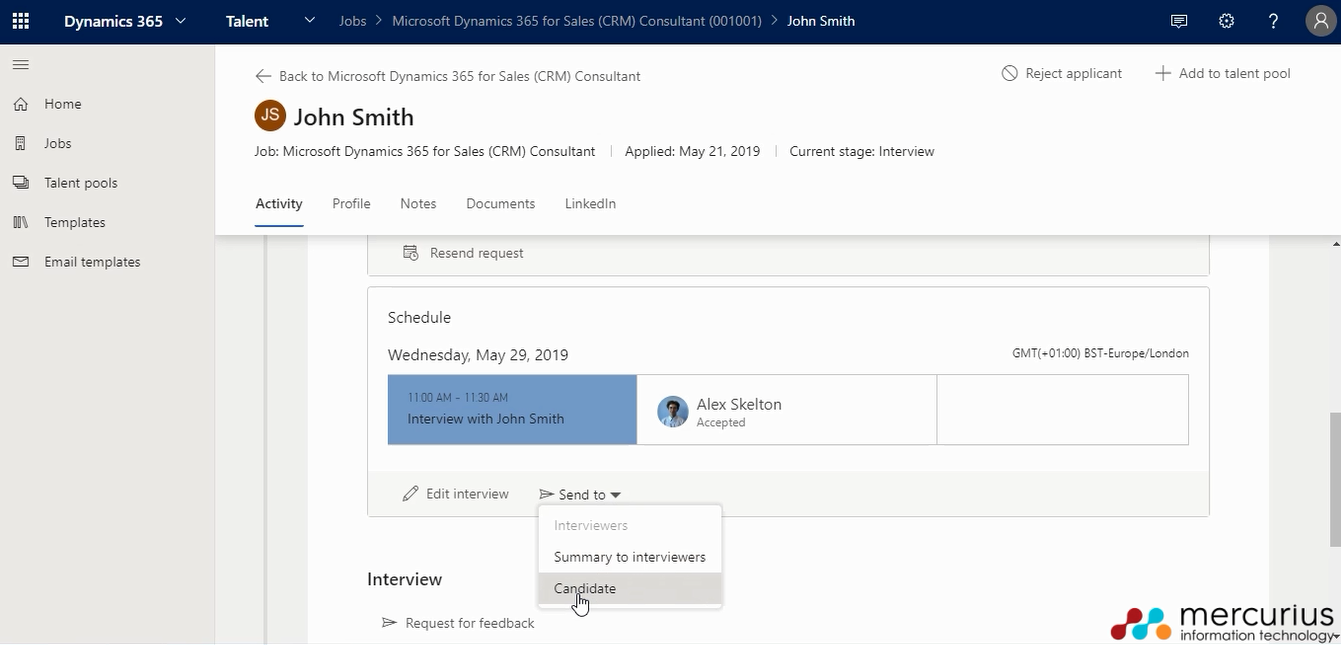
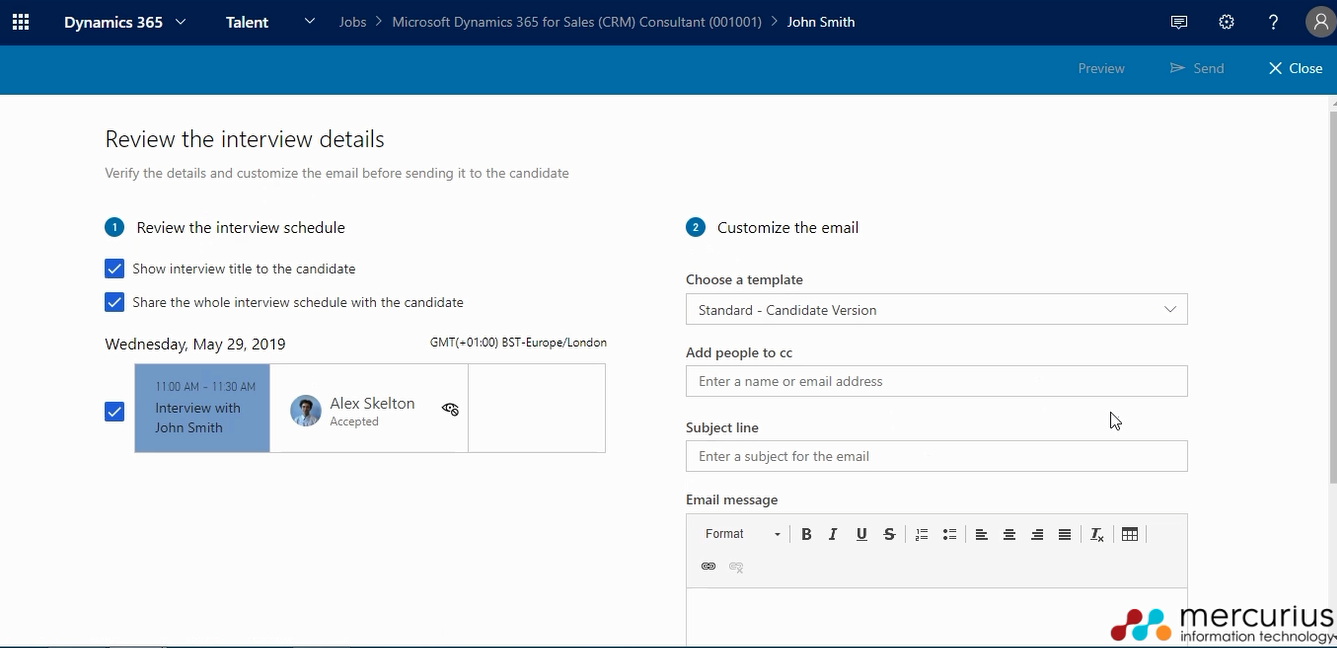
This is done via another email (with the same customisation & template options) which is sent to the client which contains all the details about the interview.
You have options to share the interview title, the entire interview schedule and the name(s) of the people conducting the interview(s).
Once sent, the candidate will have all the information and be able to add the interview as an event in their calendar.
6. (Recruiter): Providing feedback
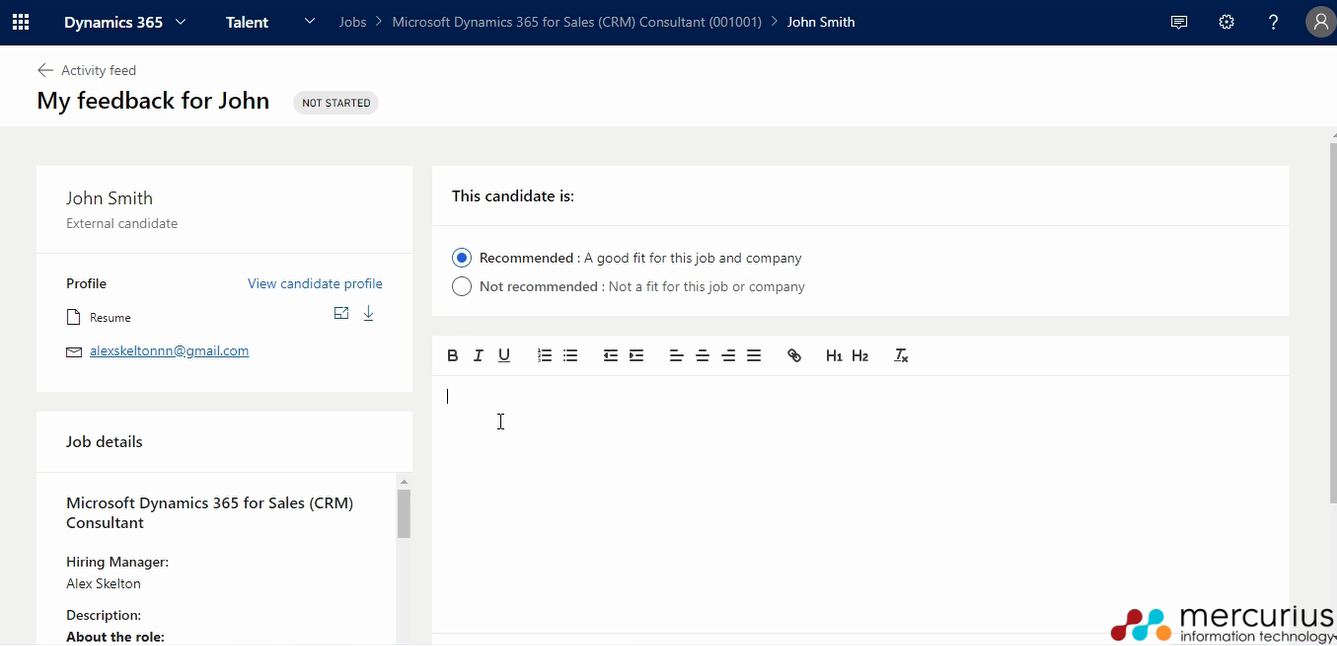
With this next step, we presume the interview has taken place. The next step going forward would be to provide feedback to the candidate about how the interview went and their thoughts on it. The feedback page allows you to write a quick message to the candidate & hiring team, stating whether they are recommended for the job – this ensures more transparency throughout the process for both the hiring team and candidate.
7. (Recruiter): Preparing the offer
Now we are at the step where we’ve decided we want to hire this candidate. Clicking advance stage will take the candidate to the last step of the job application process which is the offer.
After clicking the ‘prepare offer’ button, you’ll be taken out of the Attract app into the Offer app. This is still part of the Talent platform and it is the place where you can create and design your offer packages for new recruits.
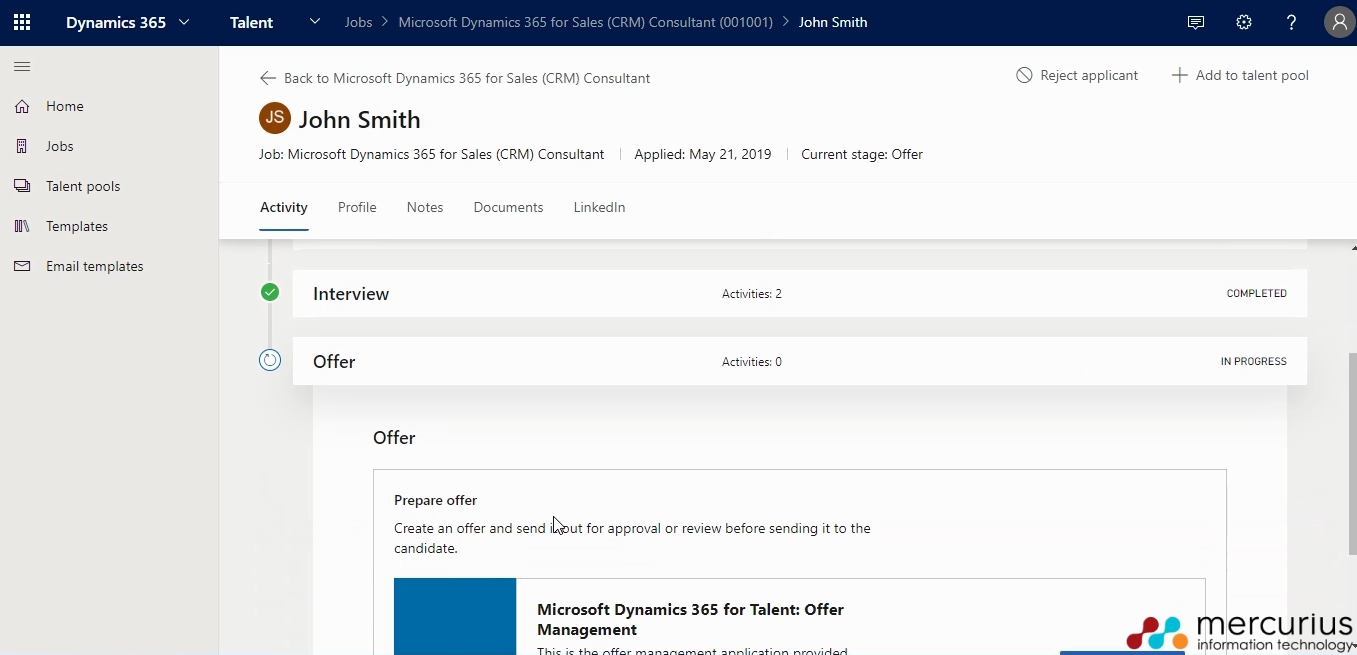
An offer package contains documents (templates) and all the information that your new hire needs before starting at your organisation. The offer package amalgamates multiple documents into one space to make it easy for the candidate to understand and use. You are able to create and save multiple package templates making this process a lot quicker once completed a couple of times.
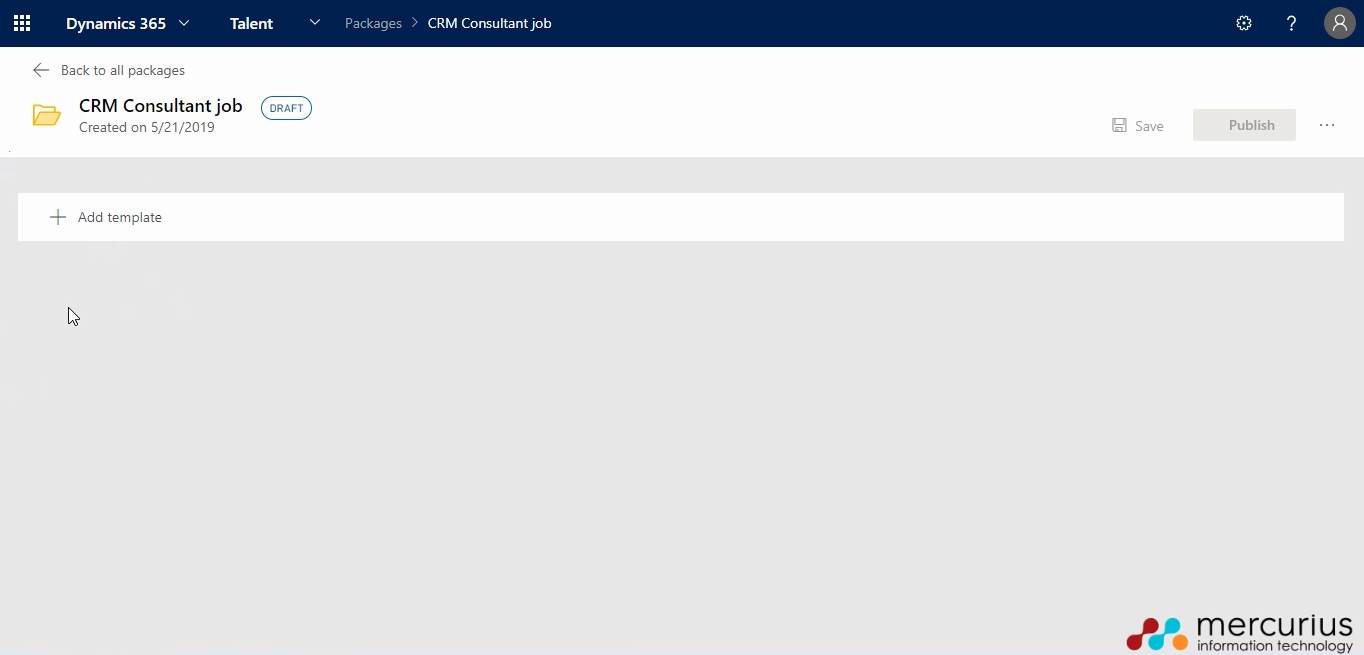
The template is a blank document where you can put all the information you want to share with the new hire. On the right-hand side there are pieces of data that you can insert into the document about the candidate and the job listing – this is very useful as it means you don’t have to go back and double check anything and it can automatically be inserted. After you’re done writing your template, clicking save and finish will turn it from draft to active.
If you want to create multiple documents for the offer package then just simply repeat this process until you’ve got everything you need.
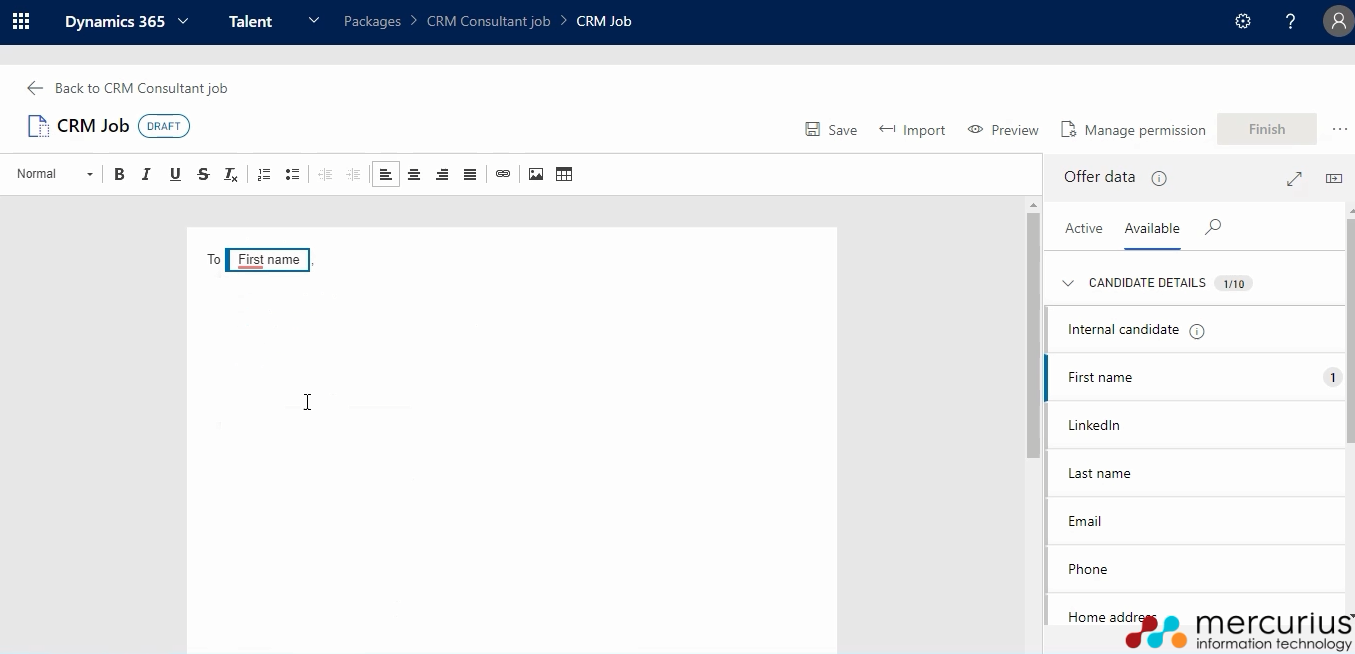
After you’ve got everything ready for your offer package, you can click save then publish. There is an option to set the document as either ‘required’ or ‘not required’ – for a package to be published, at least one document has to be set as required. Once this has been completed and your offer package is active, head back to the offers tab.
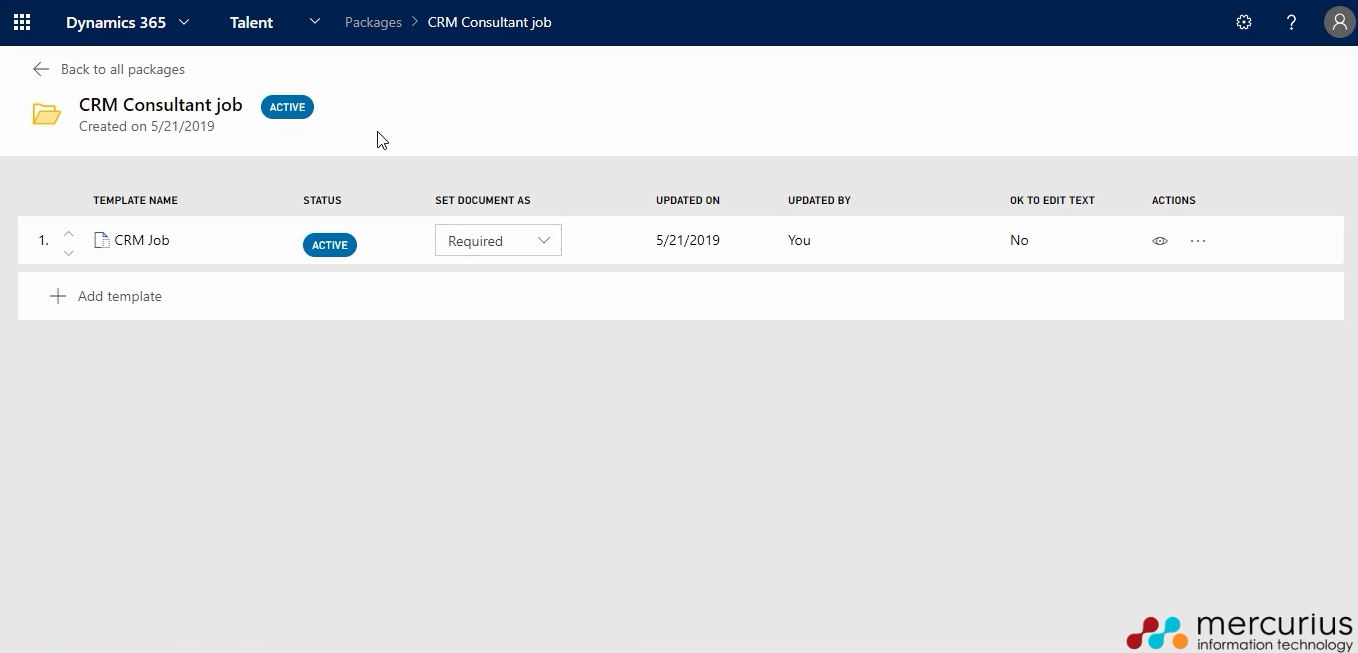
You can then prepare the offer for the new hire and select the offer package that you’ve just created, or use a saved template (if you have them in place).
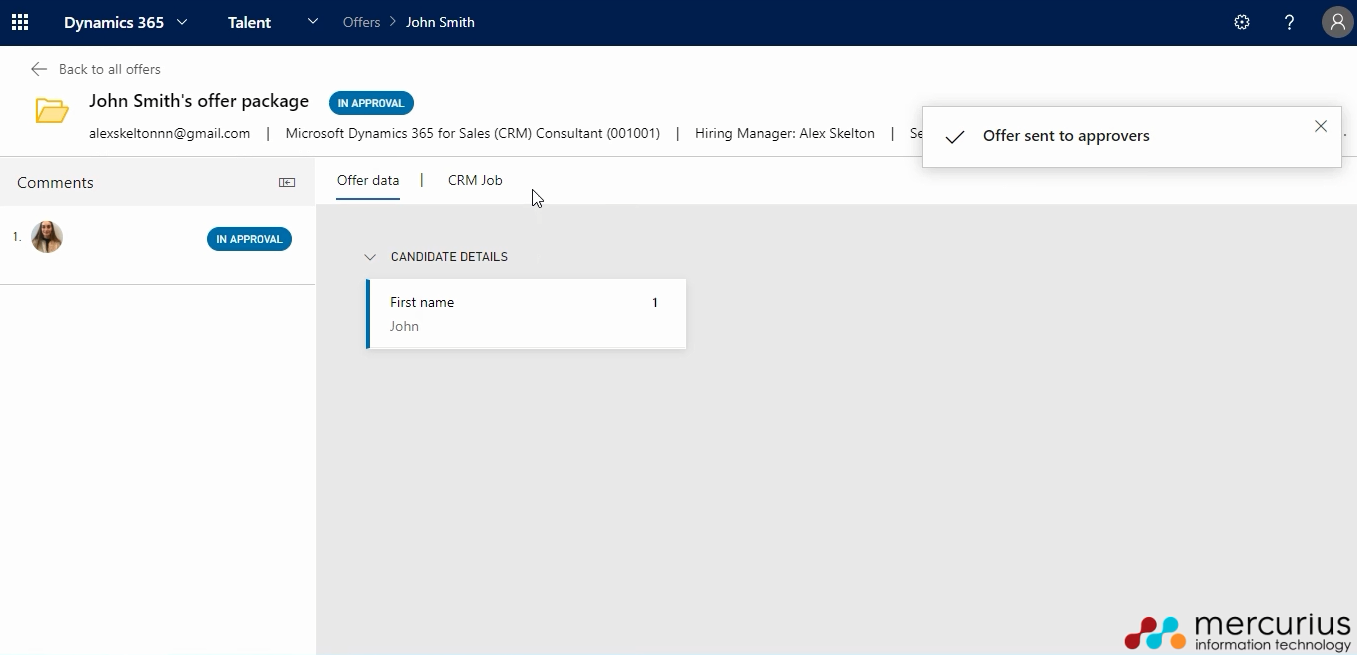
You’ll then be taken to another screen to choose the approvers for this offer package. As a new hire will often have to be signed off and approved by a higher up member of staff, this is where you can enter their email and do so. After selecting who is the approver of this, you can send it to them through another customisable email as we have been doing so before.
Once the email is sent, the offer package will be in approval, as seen in the screenshot below.
8. (Recruiter): Send offer package to the candidate
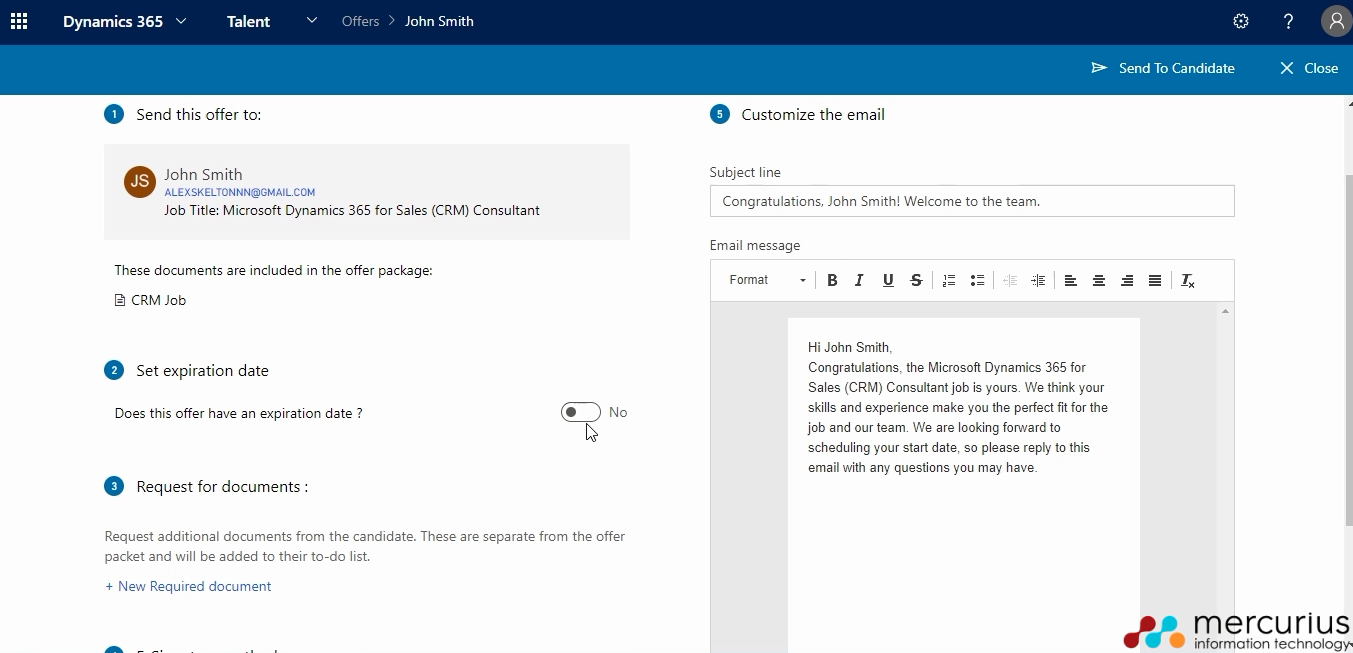
Now after the offer package has been approved, it’s time to send it off to your newest employee. Once again this is done via an email which has the package attached to it. You have options on the left column to set an expiration date for the offer, request more documents and get an e-signature to sign and accept the offer. After this has been sent to the candidate, you can work on using the Onboard app inside Talent to set your employee up for success when starting. (Stay tuned for a video/blog post on that!)
We hope this blog post has shown you just how easy and streamlined the application to offer process is when using Dynamics 365 for Talent. If you’d like to learn more about talent, visit our web page or other blog posts about the application – or alternatively, give us a call on 01908508080 or email us at [email protected]


