There have been significant improvements in the offerings of cloud technology in recent times, leading to businesses around the world looking to implement cloud-based infrastructure in their organisation. Moving to the cloud has its share of challenges when we examine how data is exchanged. One such aspect is that of data storage on BLOB.
This blog post will demonstrate how to upload files from local machines to Blob and to SFTP
Configuring Azure Storage
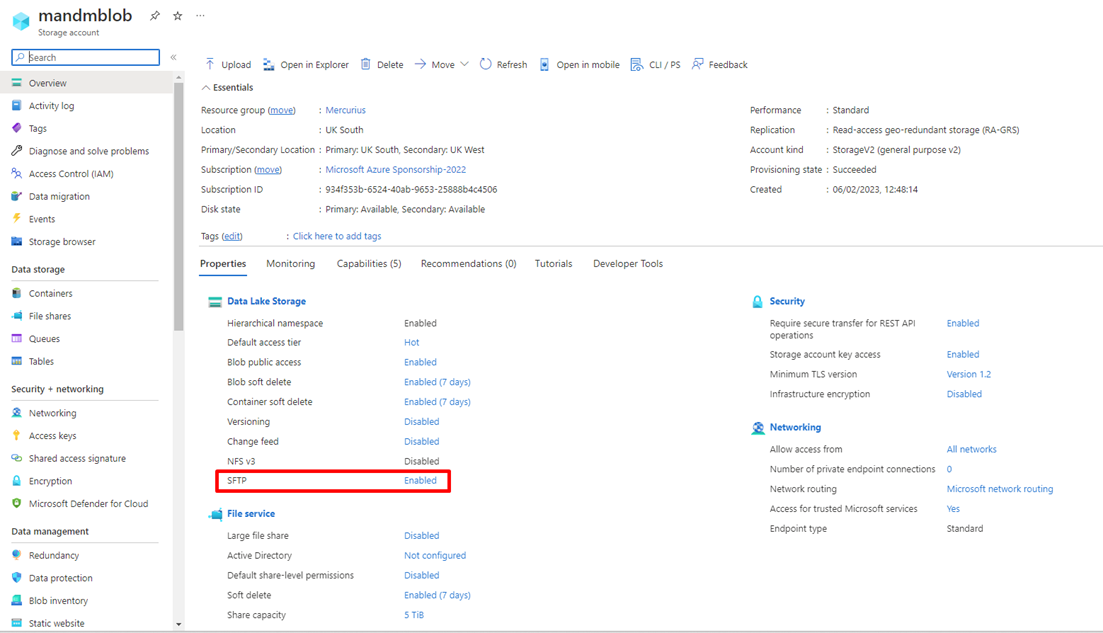
To start with, the first requirement is to configure Azure Storage. Make sure you have a valid subscription to Azure Logic Apps and Azure Storage.
It is important to enable SFTP as shown above.
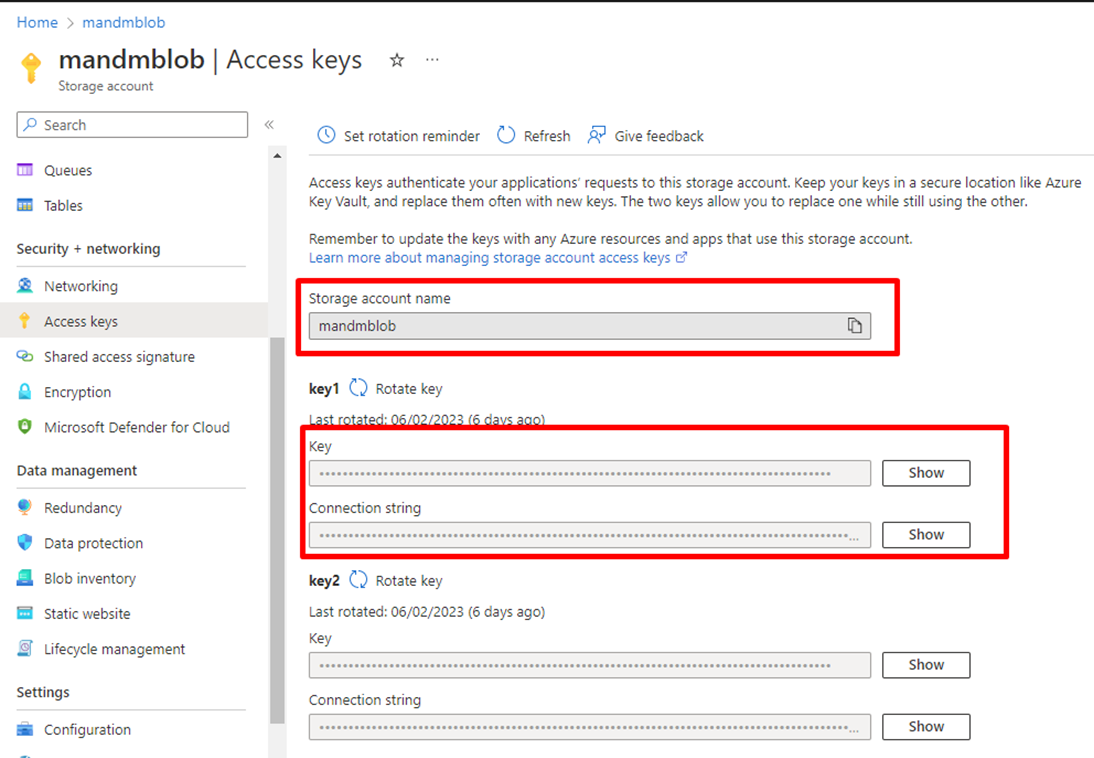
To access the blob storage there is an access key, which has to be used. This is defined in the access key section of the BLOB storage. In principle, the access-key can be viewed as a key to authenticate a connection and the identification happens with the Storage Account Name.
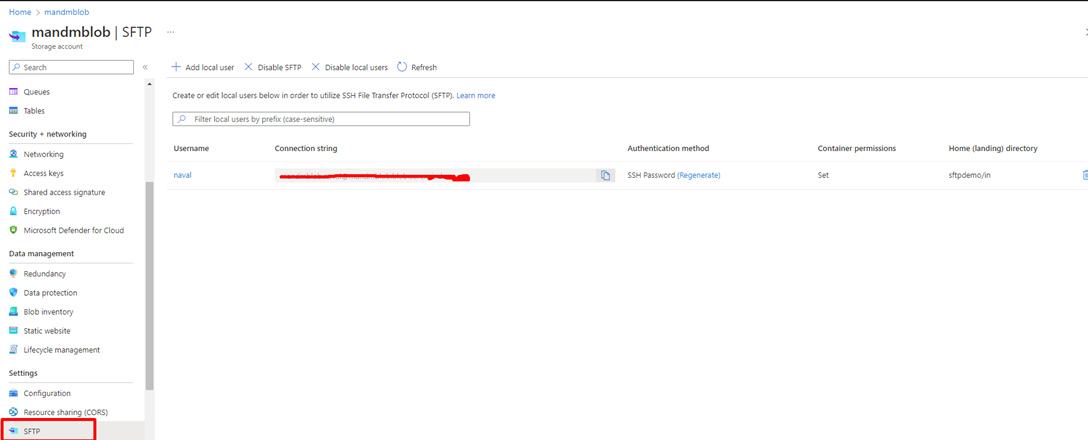
SFTP configuration:
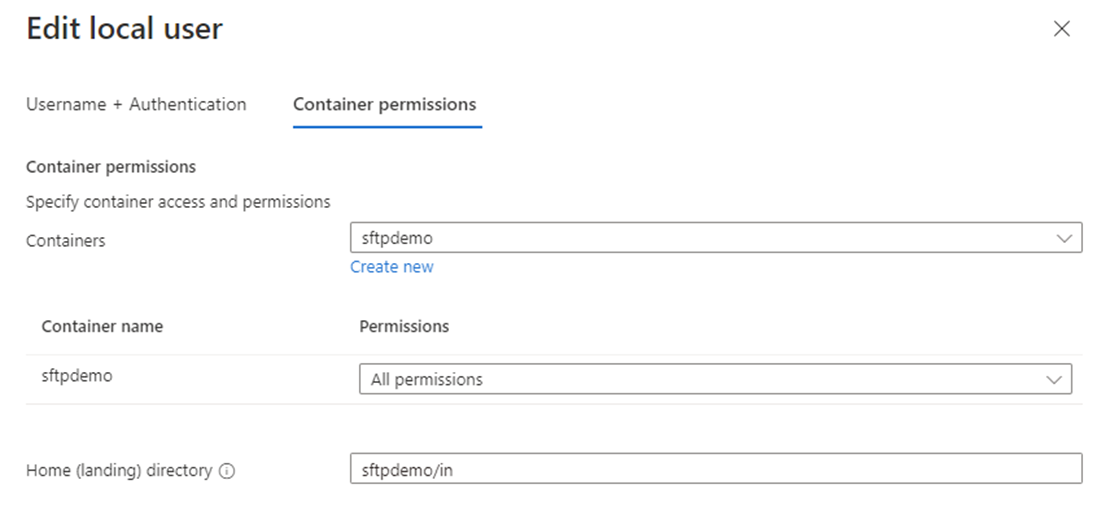
As seen in the above screenshot we can define permissions to the container which is going to handle the data, and what will be the home directory for SFTP files.
Storage Containers:
Having a storage account alone will not work, in order for the blob storage to work we have to create what is called as a storage container.
As seen in the screenshot, a container named ‘sftpdemo’ has been created that will contain all the files which are uploaded from Business Central.
Logic App
The file upload will not function unless a Logic App for the same is configured. For configuring the Logic App make sure you have already subscribed to the Logic App and have it at your disposal.
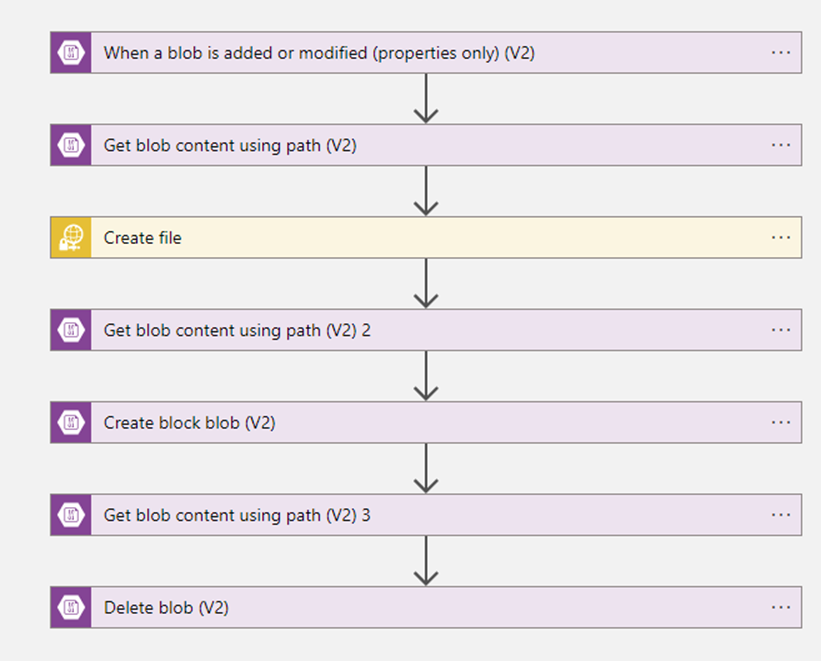
The screenshot above is the Logic App flow for uploading the file to SFTP
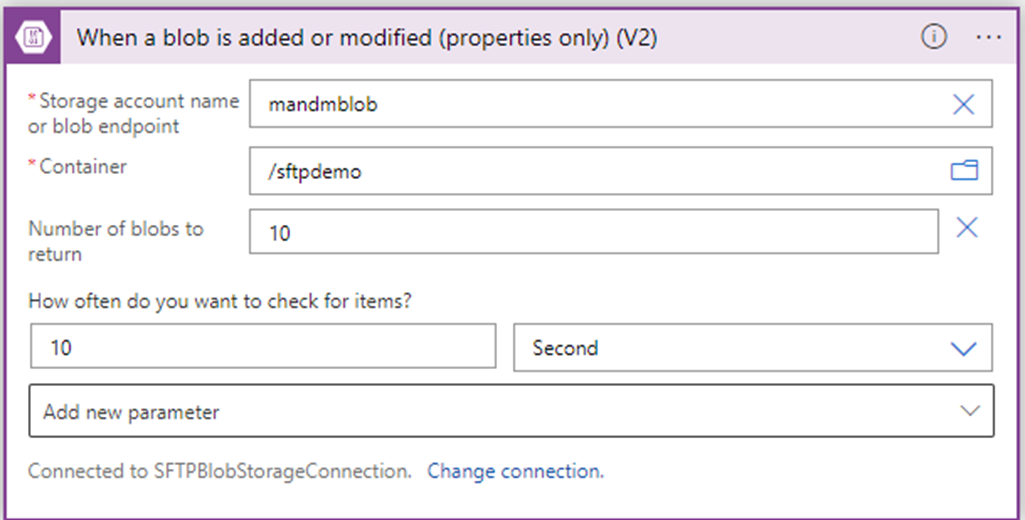
1. When a blob is added or modified (properties only) (V2)
Storage Name will be the BLOB account name.
Container: Location to which the file must be uploaded to.
How often do you want to check for Items?: Frequency of file checks in a container.
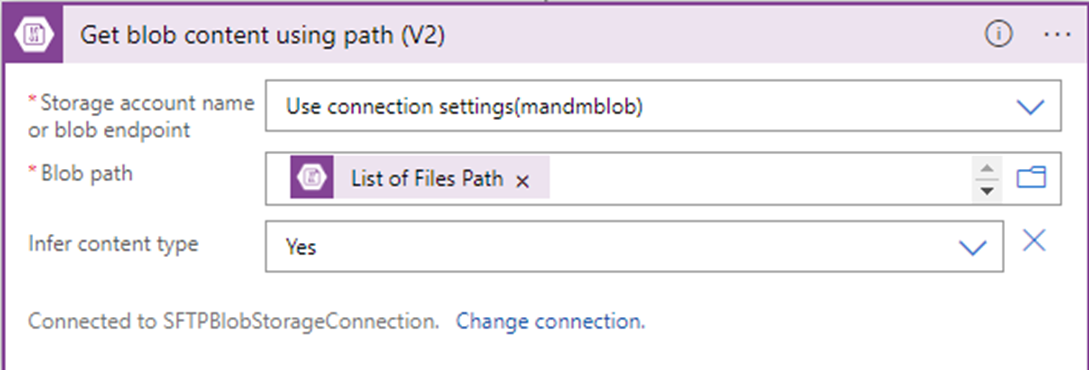
2. Get blob content using path(V2)
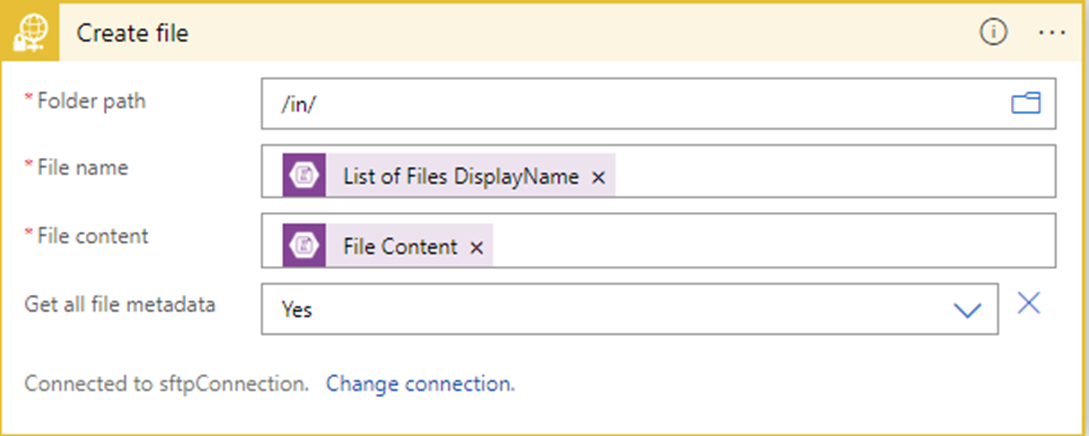
3. Create file
This trigger is a SFTP-ssh trigger which triggers when the file is created in the path specified in Folder Path.
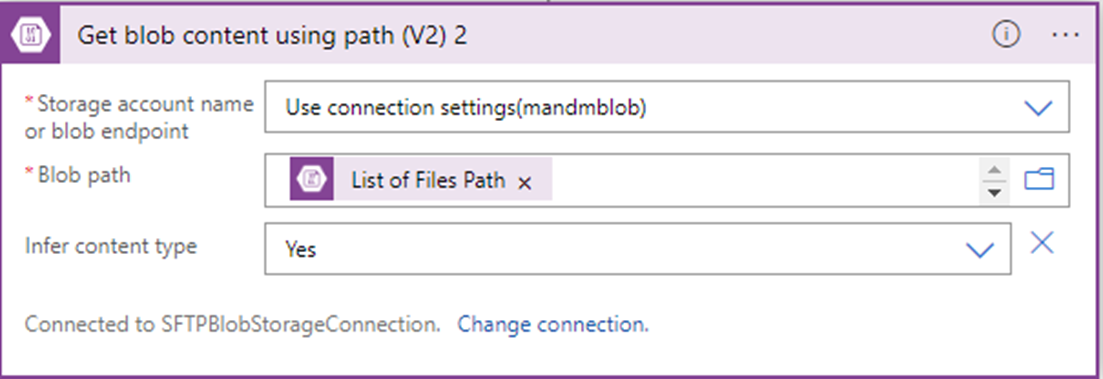
4. Get blob content using path (V2) 2
This trigger will take the content from the blob container and will help it to move to archive.
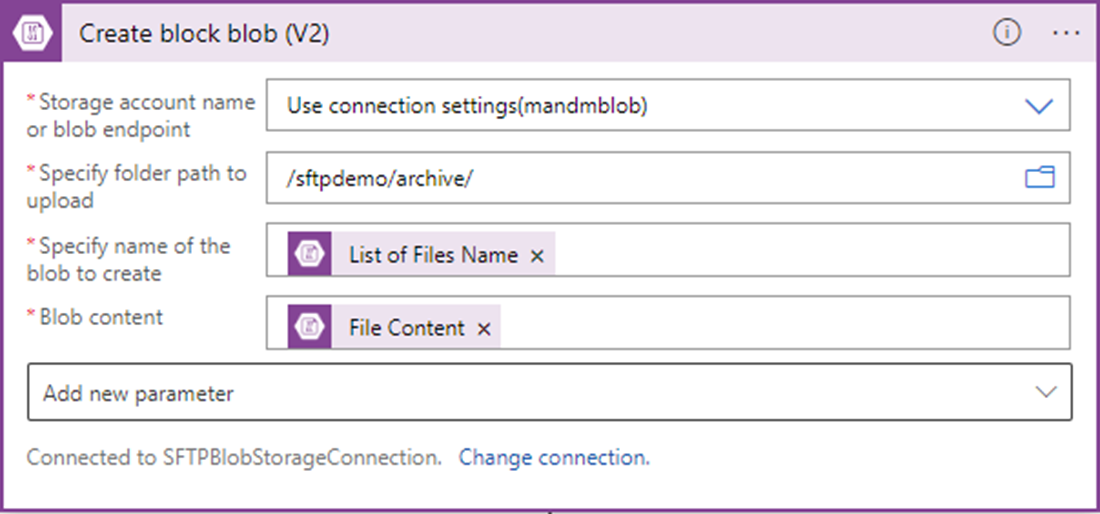
5. Create block blob (V2)
This trigger will move the file from blob container to archive folder after uploading it to SFTP.
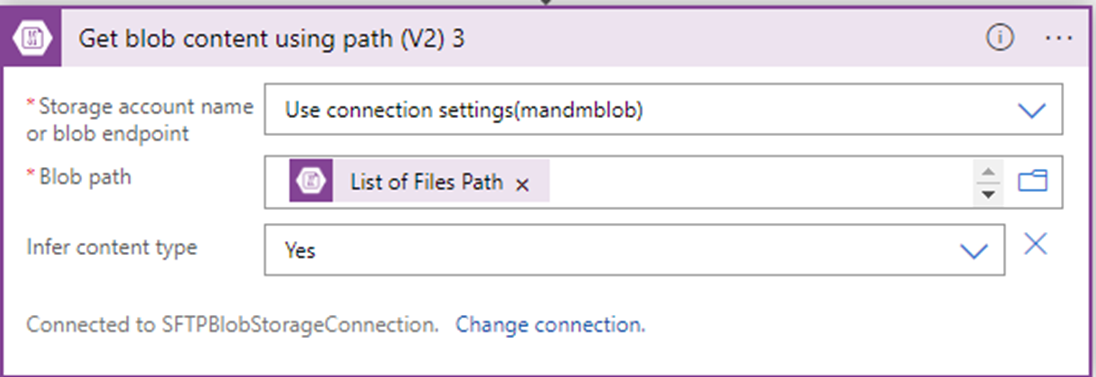
6. Get blob content using path (V2) 3
This trigger will select the file which got moved to archive and will aid in deletion of the file
7. Delete blob (v2)
This trigger will delete the file which has been moved to archive.
Thus, we have readied all the required pre-requisites from SFTP for the file upload to SFTP. Now we will move to logic building in AL for the upload of files.
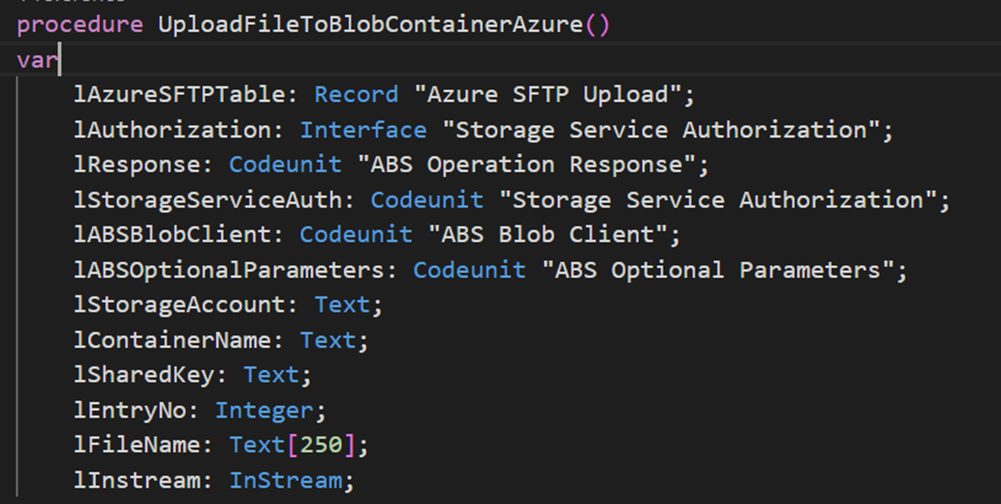
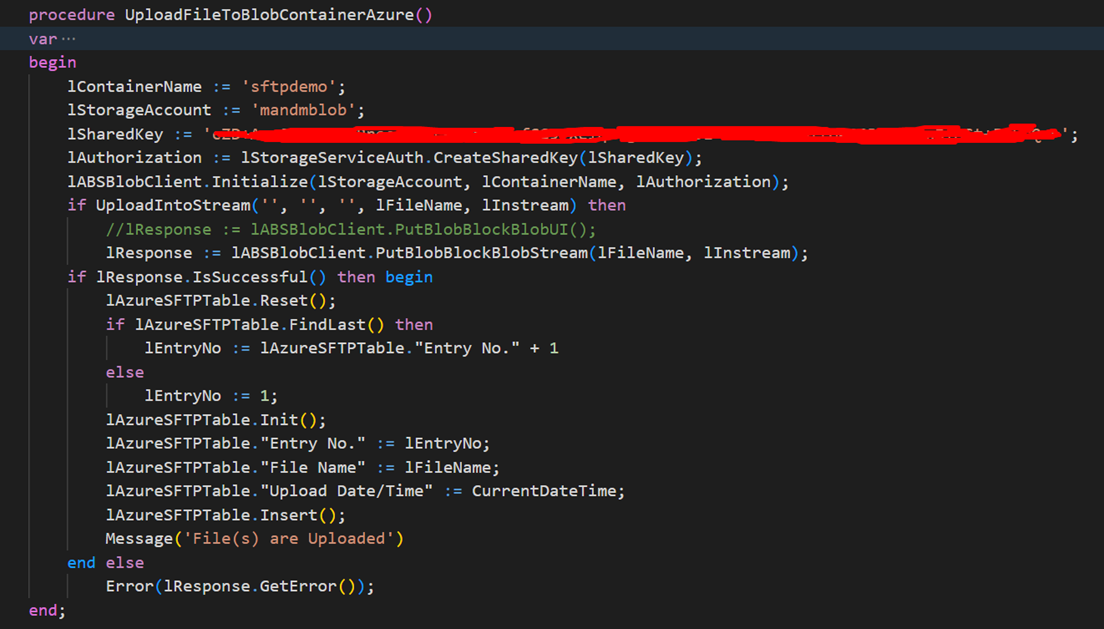
In AL I created a codeunit which holds the function to upload the file to blob.
As seen in the above screenshot I’ve used the standard business central blob storage objects.
I’ve hard coded a few parameters like the Container Name, Storage Account and the shared key Shared key is passed to a function “CreateSharedKey” in Storage Service Authorization codeunit which in turn returns an Interface.
Then the parameters Container Name, Storage Account and the interface lAuthorization to a function “Initialize” of the codeunit ABS Blob Client to initialize the connection.
Then I gave the file upload window to upload the file as a stream and passed on the file to be uploaded to the blob container using “PutBlobBlockBlobStream” function of ABS Blob Client codeunit.
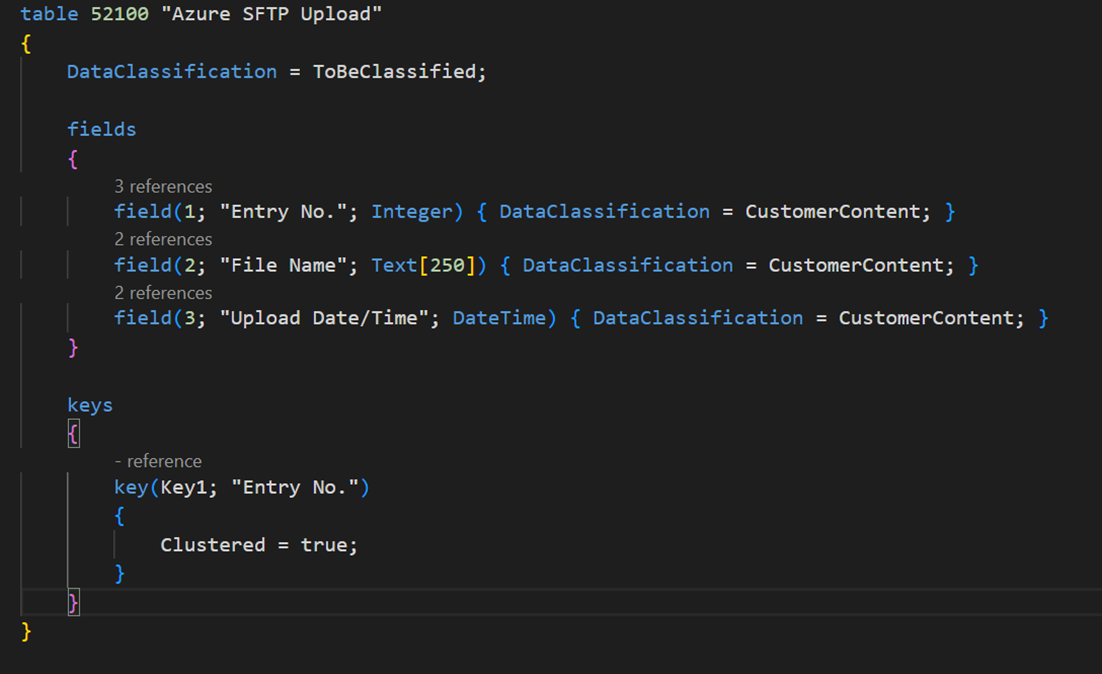
The below table has been created to store the information getting uploaded.
We hope this blog post has been insightful in showcasing how to use AL to connect to Azure Blob storage. If you would like any further information about Azure, or would like to start your cloud-transformation, please leave your details in the contact form below.


