Microsoft introduced the Outlook integration in Dynamics NAV 2015, allowing users to access Dynamics data and manage business interactions from directly in Outlook. It is a very useful feature that Microsoft introduced to help improve productivity for users. With the Outlook add-in, you can see financial data related to customers and vendors, as well as create and send financial documents.
In this blog post we will be going through each step of installing the Outlook add-in in Microsoft Dynamics 365 Business Central and showing the functionality it provides within Outlook.
Installing the Outlook add-in
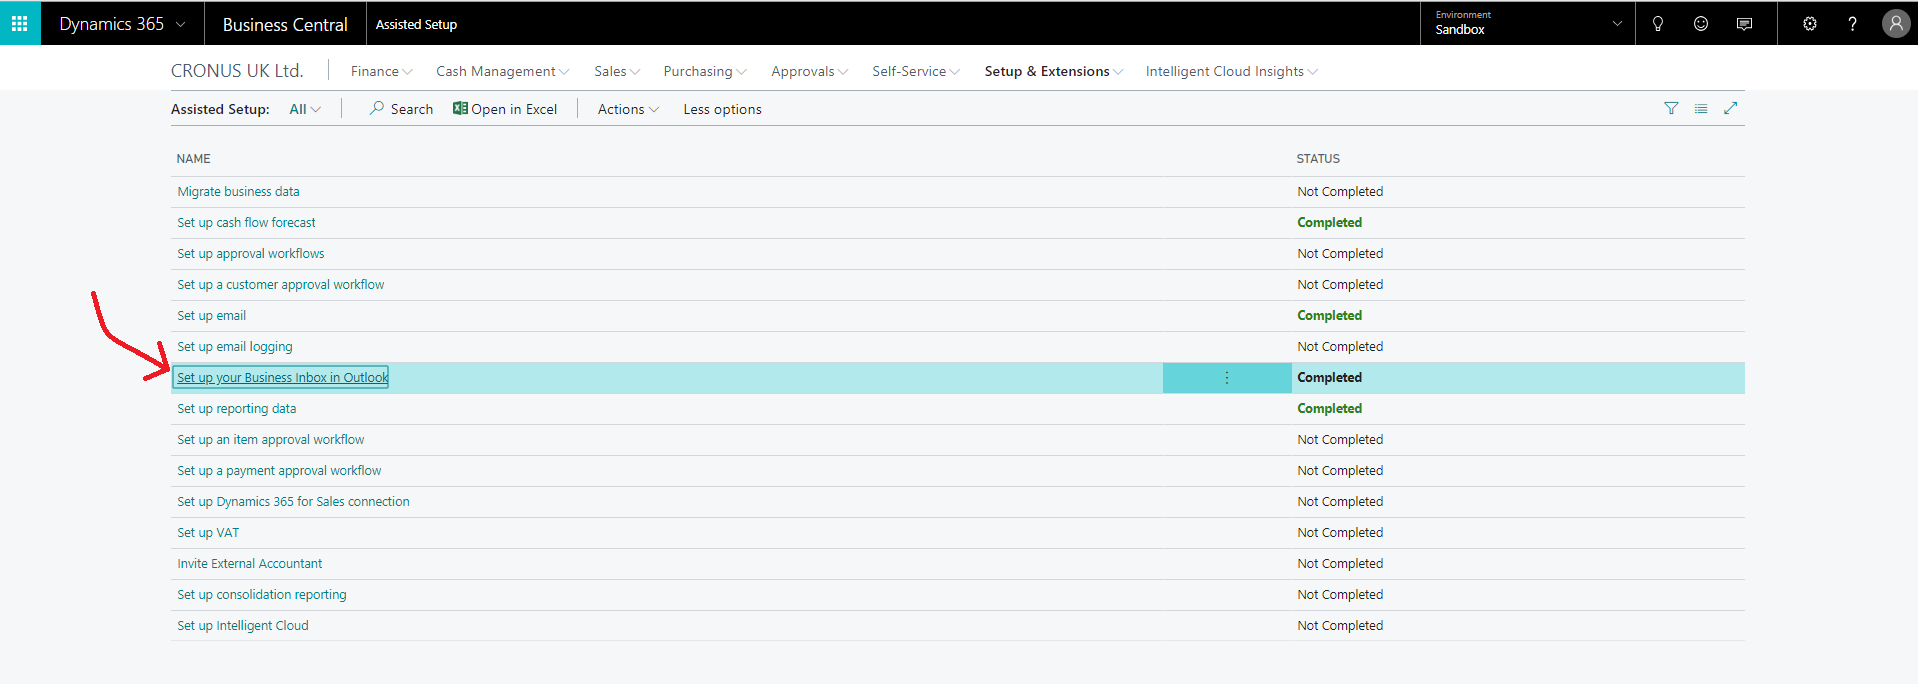
1. Log into your Microsoft Dynamics 365 Business Central instance and head to ‘Assisted Setup’. You can access it through the ‘Setup & Extensions’ menu or using the ‘Tell Me’ functionality.

2. Navigate to ‘Set up your Business inbox in Outlook’, click next on the menu.
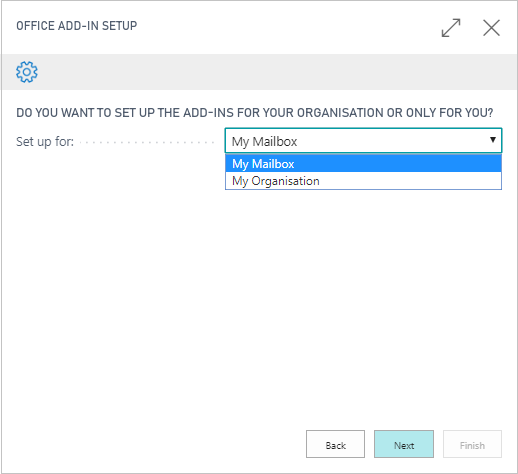
3. When asked ‘Do you want to set up the add-ins for your organisation or only you?’ Select which way you want to set up the Outlook add-in.
My Mailbox – installs the add-in for just your Outlook client.
My Organisation – installs the add-in for everyone in your organisations’ Outlook client.
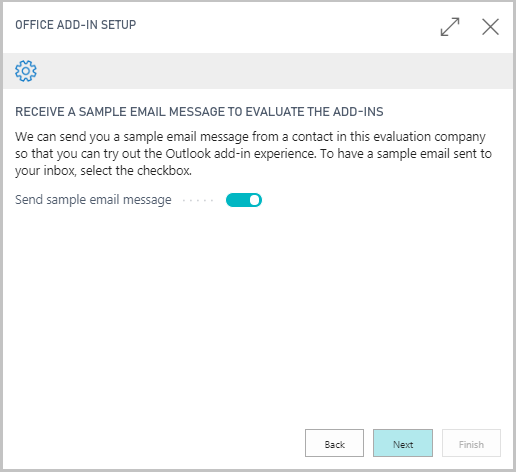
4. You then have the option of sending yourself a sample email to check that it is set up correctly.
5. Click finish to complete the add-in installation.

6. Restart your Outlook client and you should notice a new Business Central tab on the Ribbon.
What can you do with the Outlook add-in?
Now that the add-in has been installed, you can seamlessly connect to your Business Central data to get financial insights related to customers and vendors, as well as creating documents such as quotes, orders and invoices directly in Outlook.
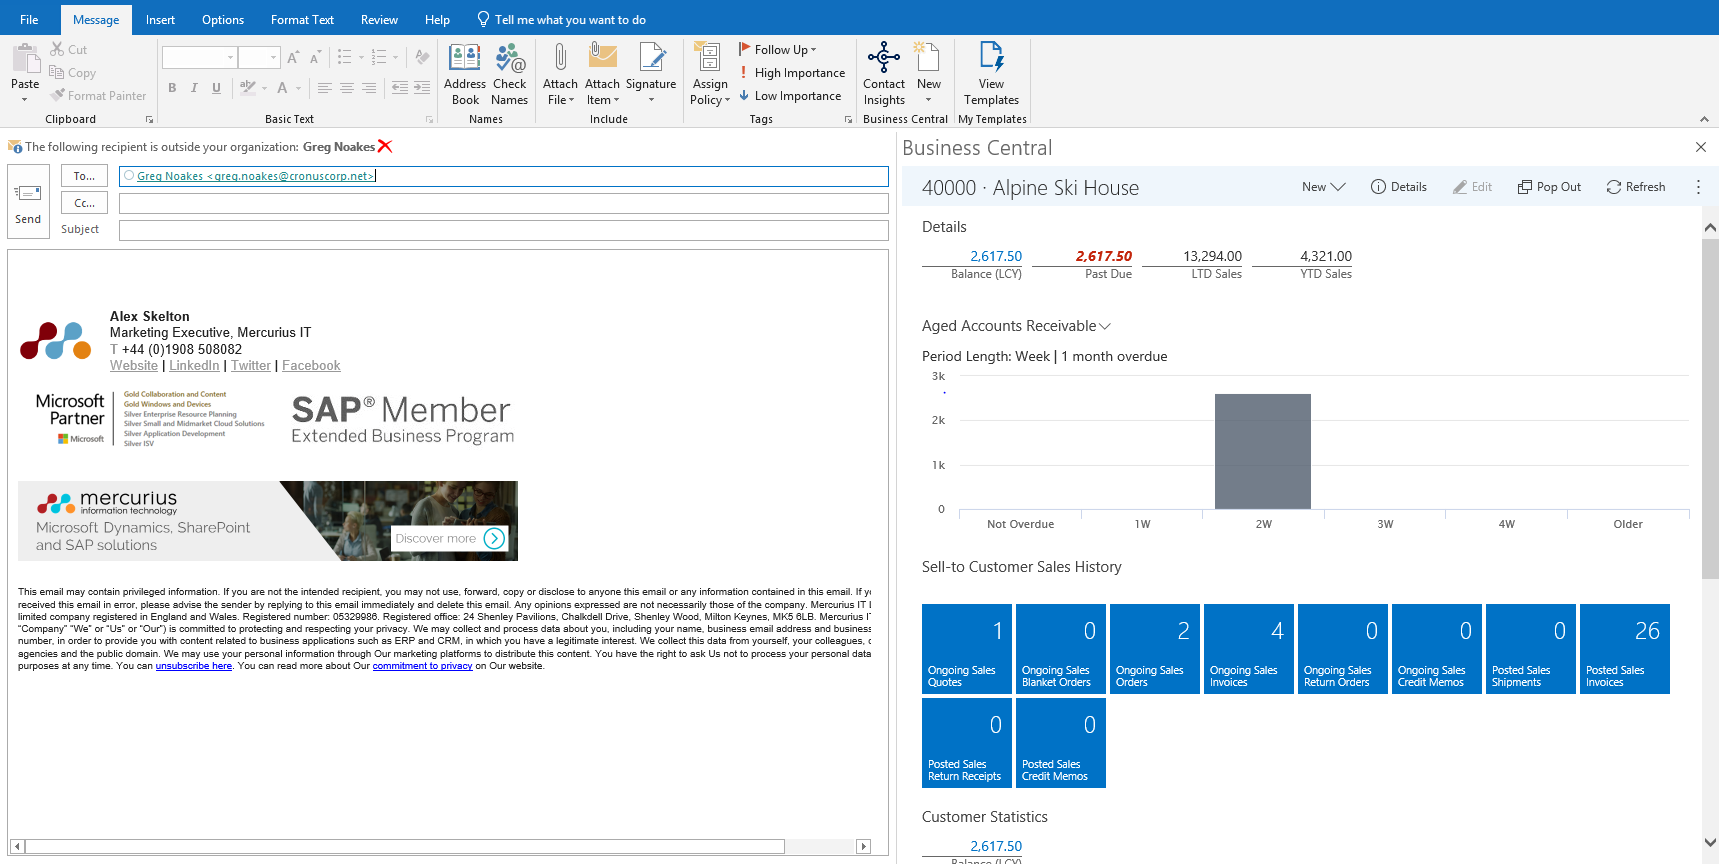
Contact insights
Contact insights allow you to access, create and edit your contact data from Business Central in Outlook. You can get into details about your contacts and quickly access relevant statistics, helping you understand the financial history before creating any documents. You can also create brand new contacts and edit the details of existing ones, which will sync to Business Central.
Sales & Purchase documents
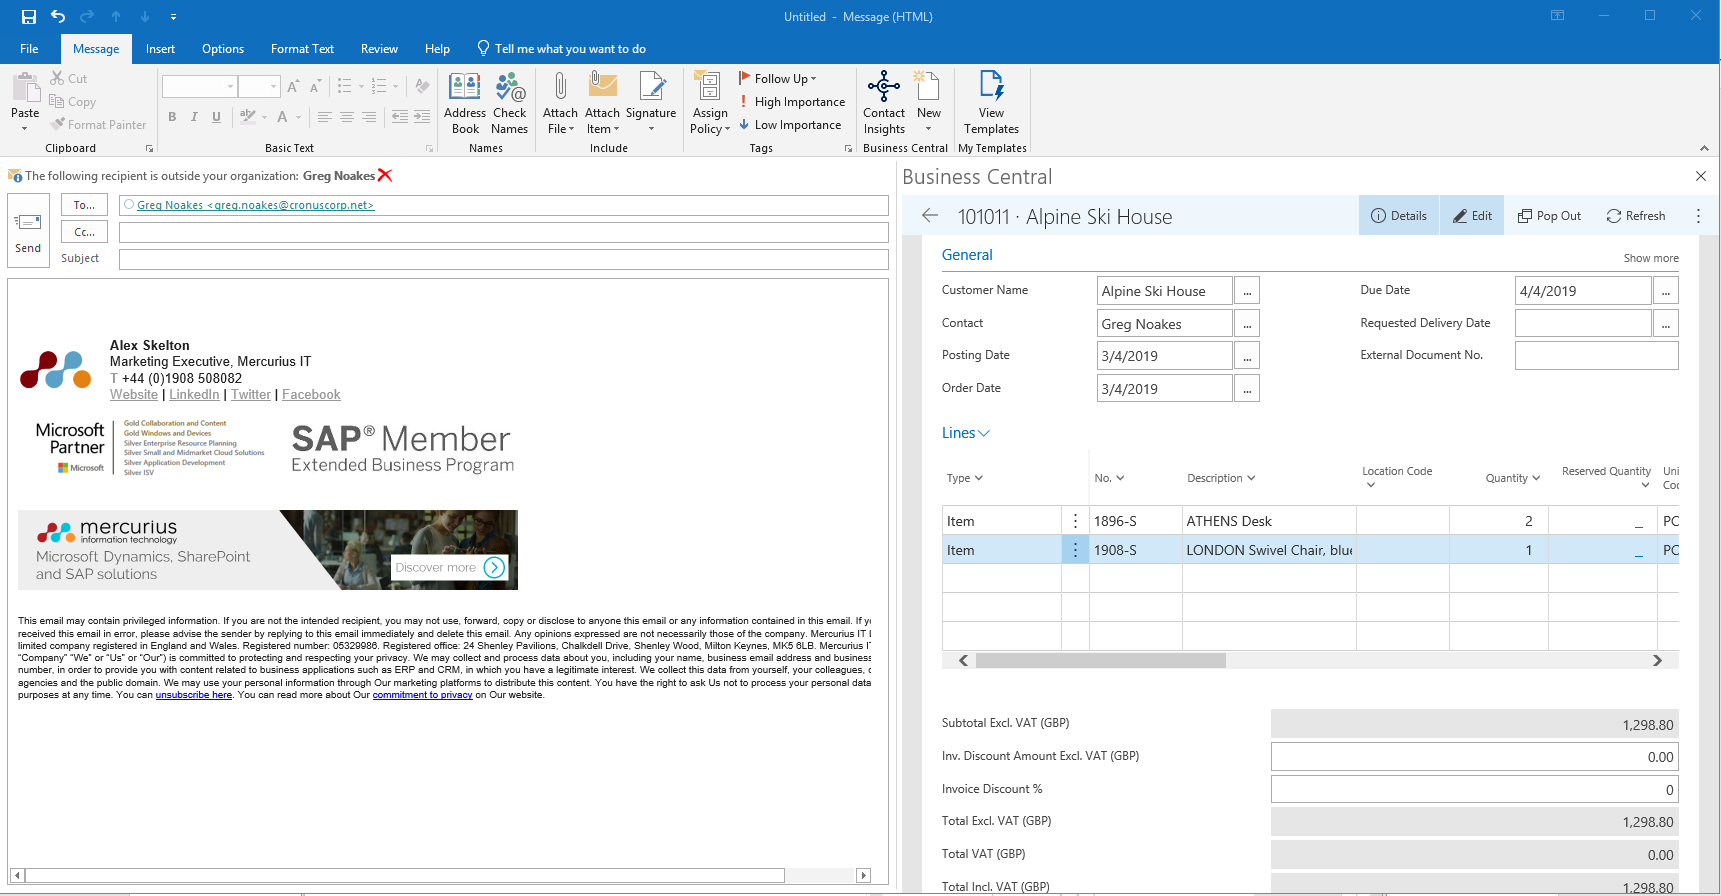
There is also functionality available that allows you to create financial documents to send out to customers and vendors from directly in Outlook.
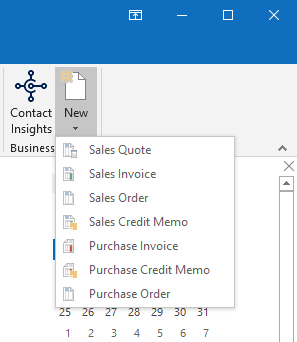
You can create the following financial documents:
- Sales Quote
- Sales Invoice
- Sales Order
- Sales Credit Memo
- Purchase Invoice
- Purchase Credit Memo
- Purchase Order
You can then create the document, once all the details have been filled out you can post it, which will email a copy to the relevant contact and post the data into Business Central.
Document finder
The ‘Document Finder’ functionality in the add-in enables you to quickly access documents which have been mentioned in previous emails. The functionality becomes available if a document number is recognised from the body of the message, allowing you to easily open the document directly in Outlook and modify and take actions on it, just like in Business Central.
We hope this blog post has guided you through the process of installing the Outlook add-in for Microsoft Dynamics 365 Business Central. If you’d like to learn more about the rich functionality of the solution, you can view our dedicated webpage or various blog posts about the solution. Additionally, get in touch with us if you are interested in implementing or upgrading to Business Central.


