In previous versions of Microsoft Dynamics NAV, employee expenses could be processed, but there was no purpose-built functionality for it. This meant employees would have to be set up as vendor cards and processed in the same way as vendor payments; quickly becoming impractical for businesses working with large numbers of both vendors and employees. In NAV 2018, however, new functionality has been added which allows employee expenses to be posted separately from vendor transactions. The process is still very similar to that for vendors, making it a familiar one to anyone already paying vendors in NAV. In this blog post, we will take you through each step of posting and reimbursing employee expenses in Microsoft Dynamics NAV.
Setting up employee cards
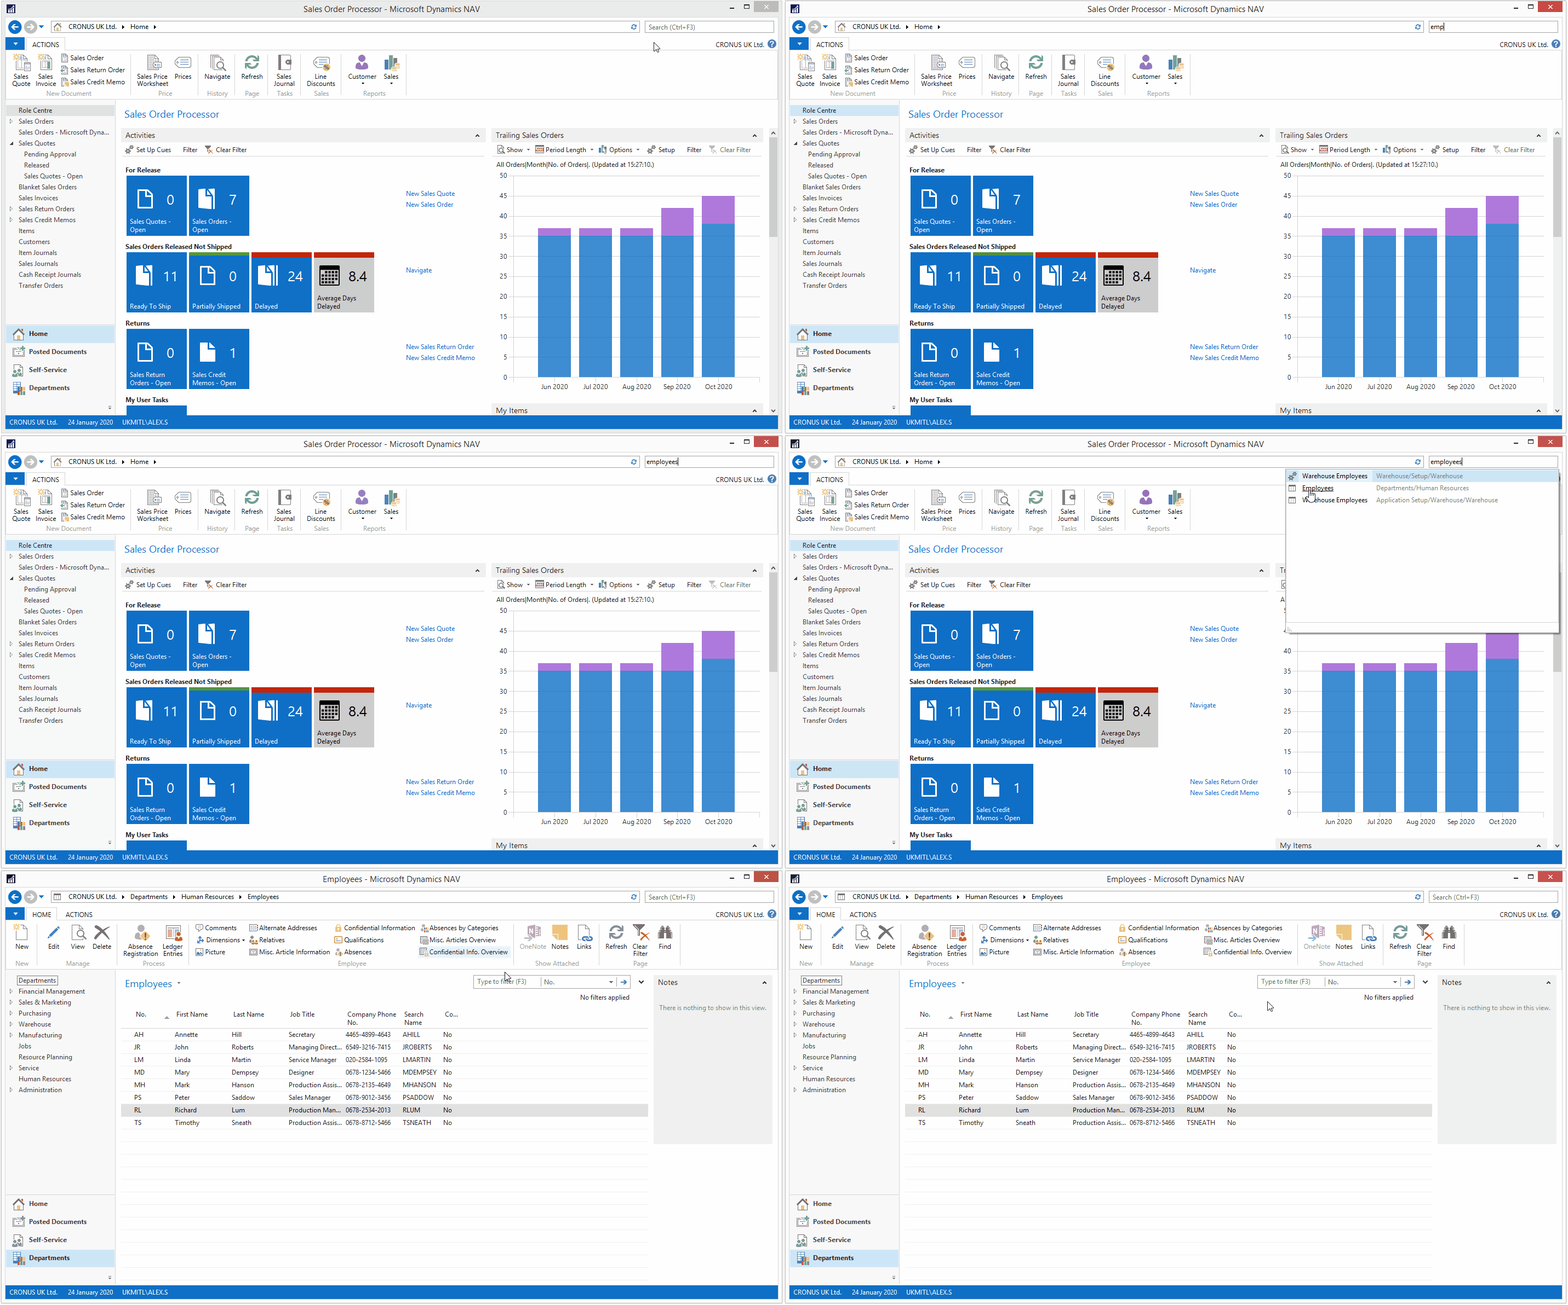
In order to post employee expenses, each employee will need an employee card. To access employee cards, type “employees” into the search bar.
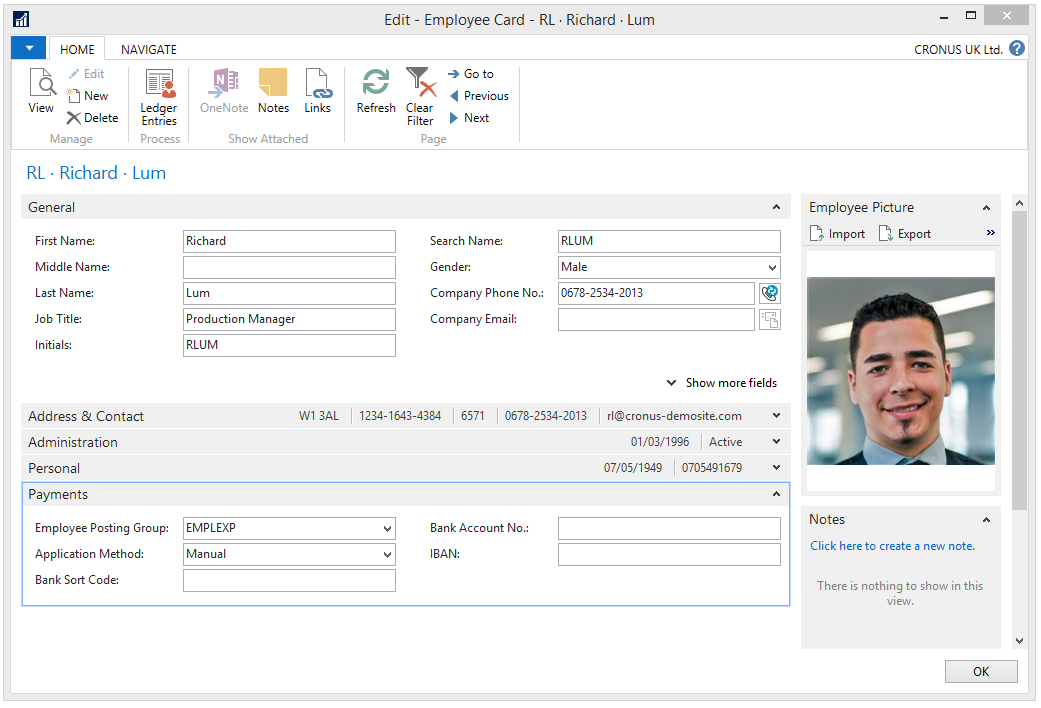
If you look at the details of an employee card, you’ll notice a “Payments” tab. This shows information about the Employee Posting Group, Application Method and bank details such as Sort Code, Account Number and IBAN; allowing payments to be transferred directly to employee bank accounts.
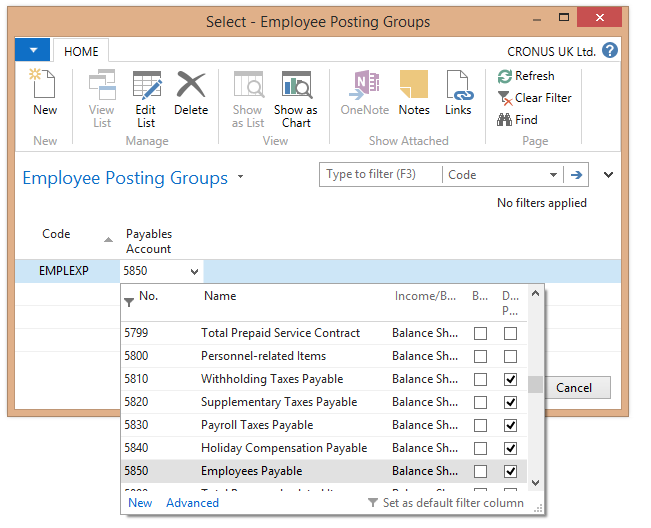
Employee Posting Groups are a new feature in NAV 2018 and are used to map payments to the correct G/L account.
Posting employee expenses
Once the employee cards have been set up, the next step is to navigate to the “General Journal”. Leave the “Document Type” blank and set the “Account Type” to “Employee”. The “Account Number” should be the employee who the expense is being paid to and the “Bal. Account Type” should be “Employees Payable”.
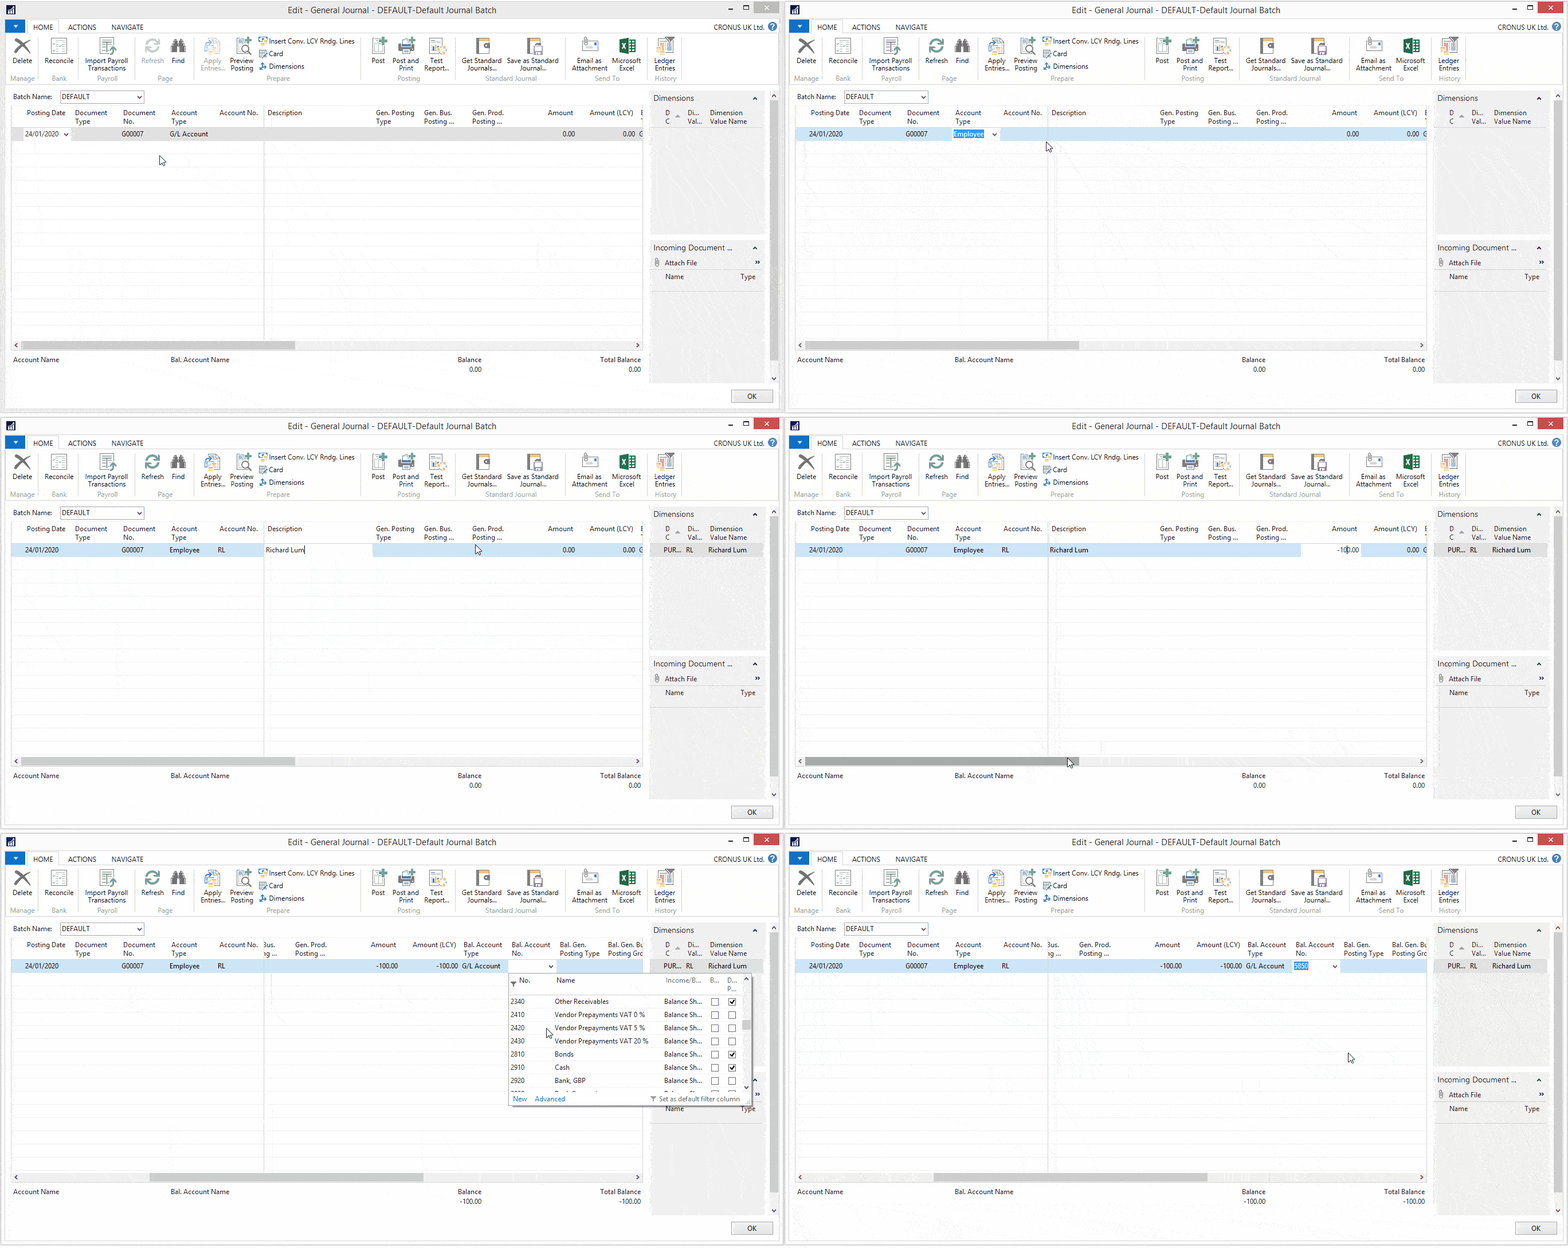
Once the expense has been posted, navigate back to the employee card and select “Ledger Entries” from the ribbon. You will see that the expense has been posted and is waiting for reimbursement. If multiple expenses have been posted for the same employee, you will see all of them in this window.
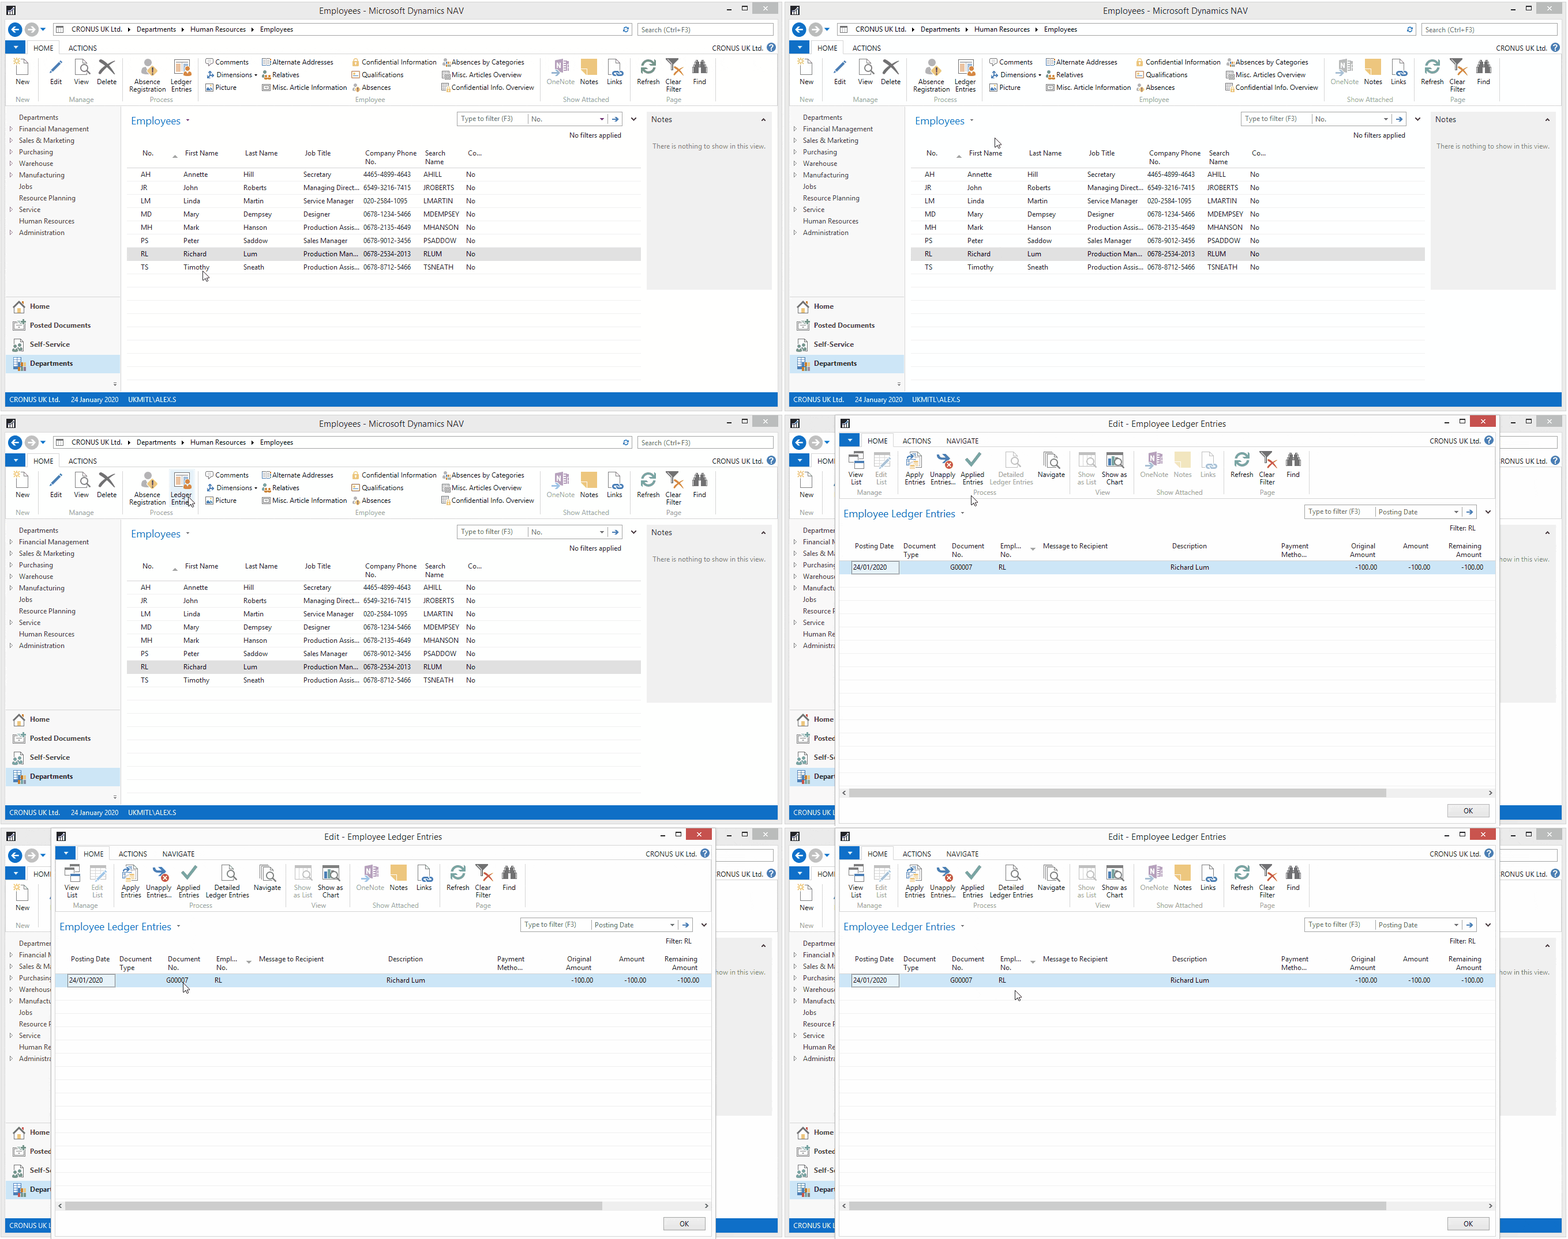
Reimbursing employee expenses
To reimburse employee expenses and make payments to employee bank accounts, navigate to the “Payment Journal” window using the search bar.
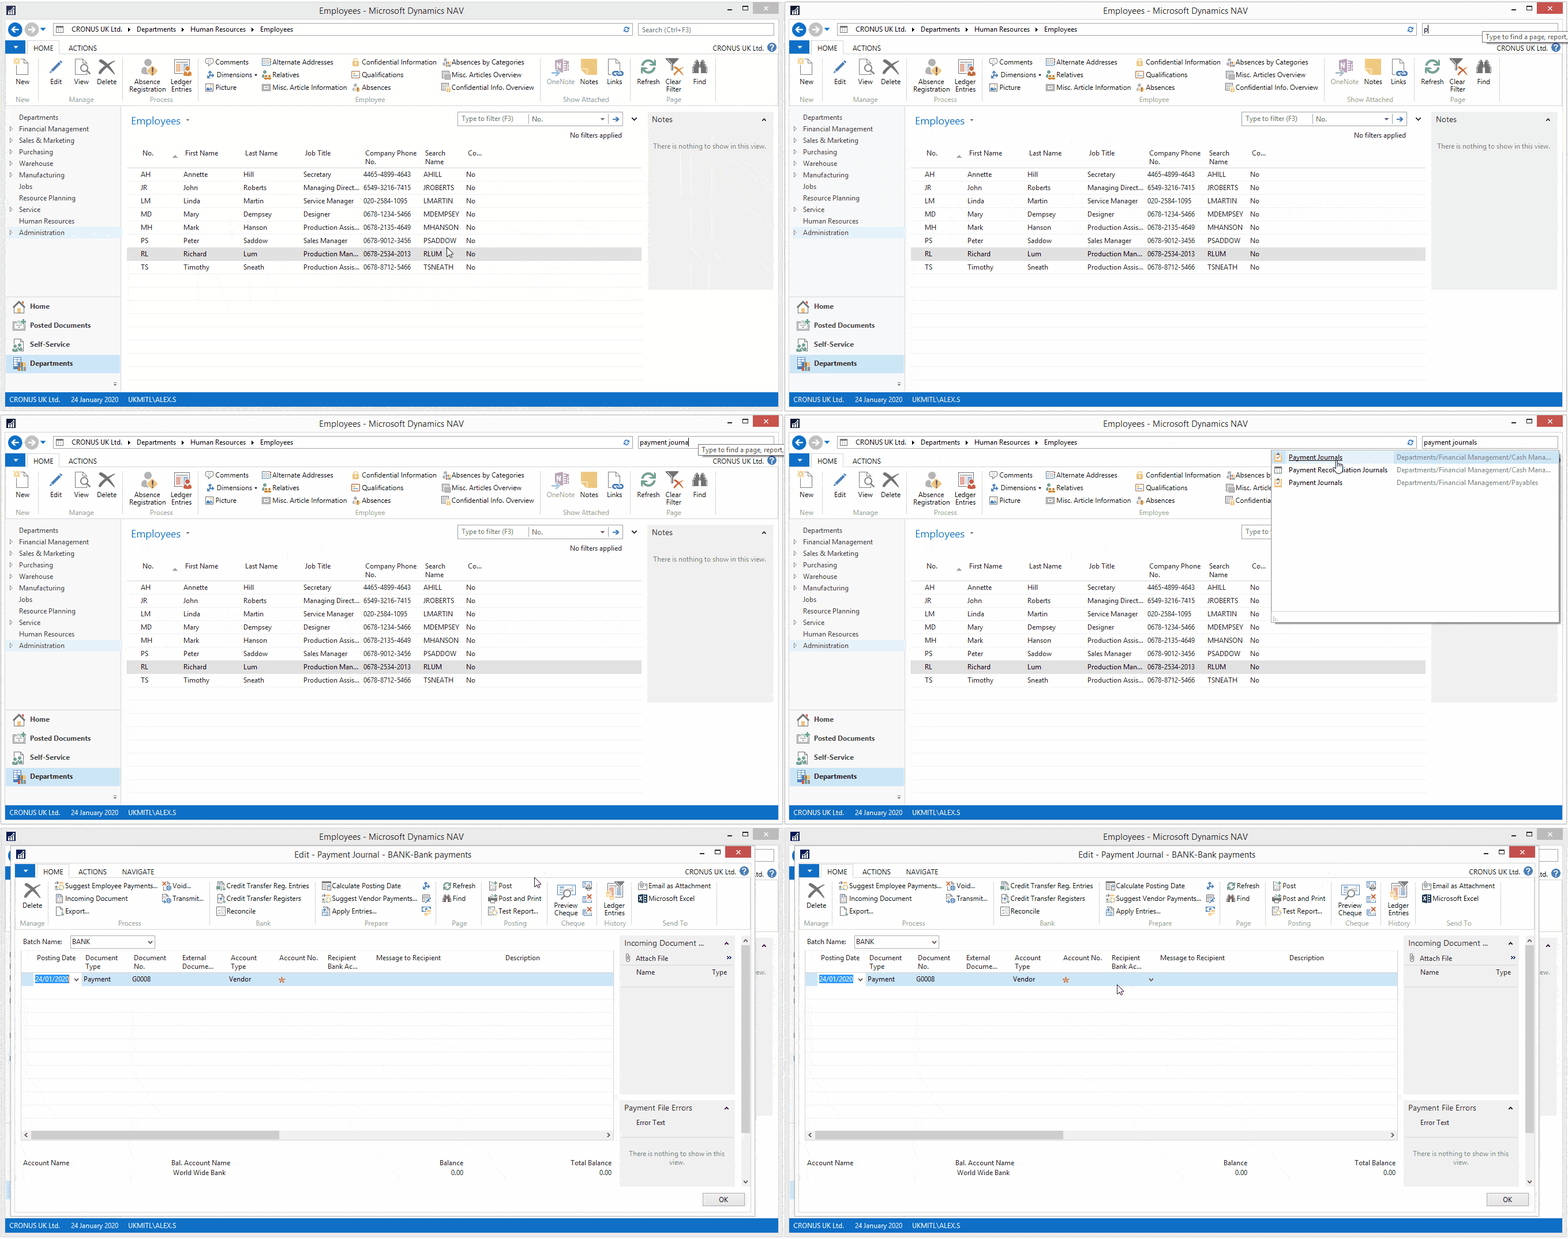
In NAV 2018, there is an added function to “Suggest Employee Payments”, in much the same way as “Suggest Vendor Payments”. Once this is selected, a new window will open, prompting you to enter information related to the payment before posting the payment to be paid to the employee.
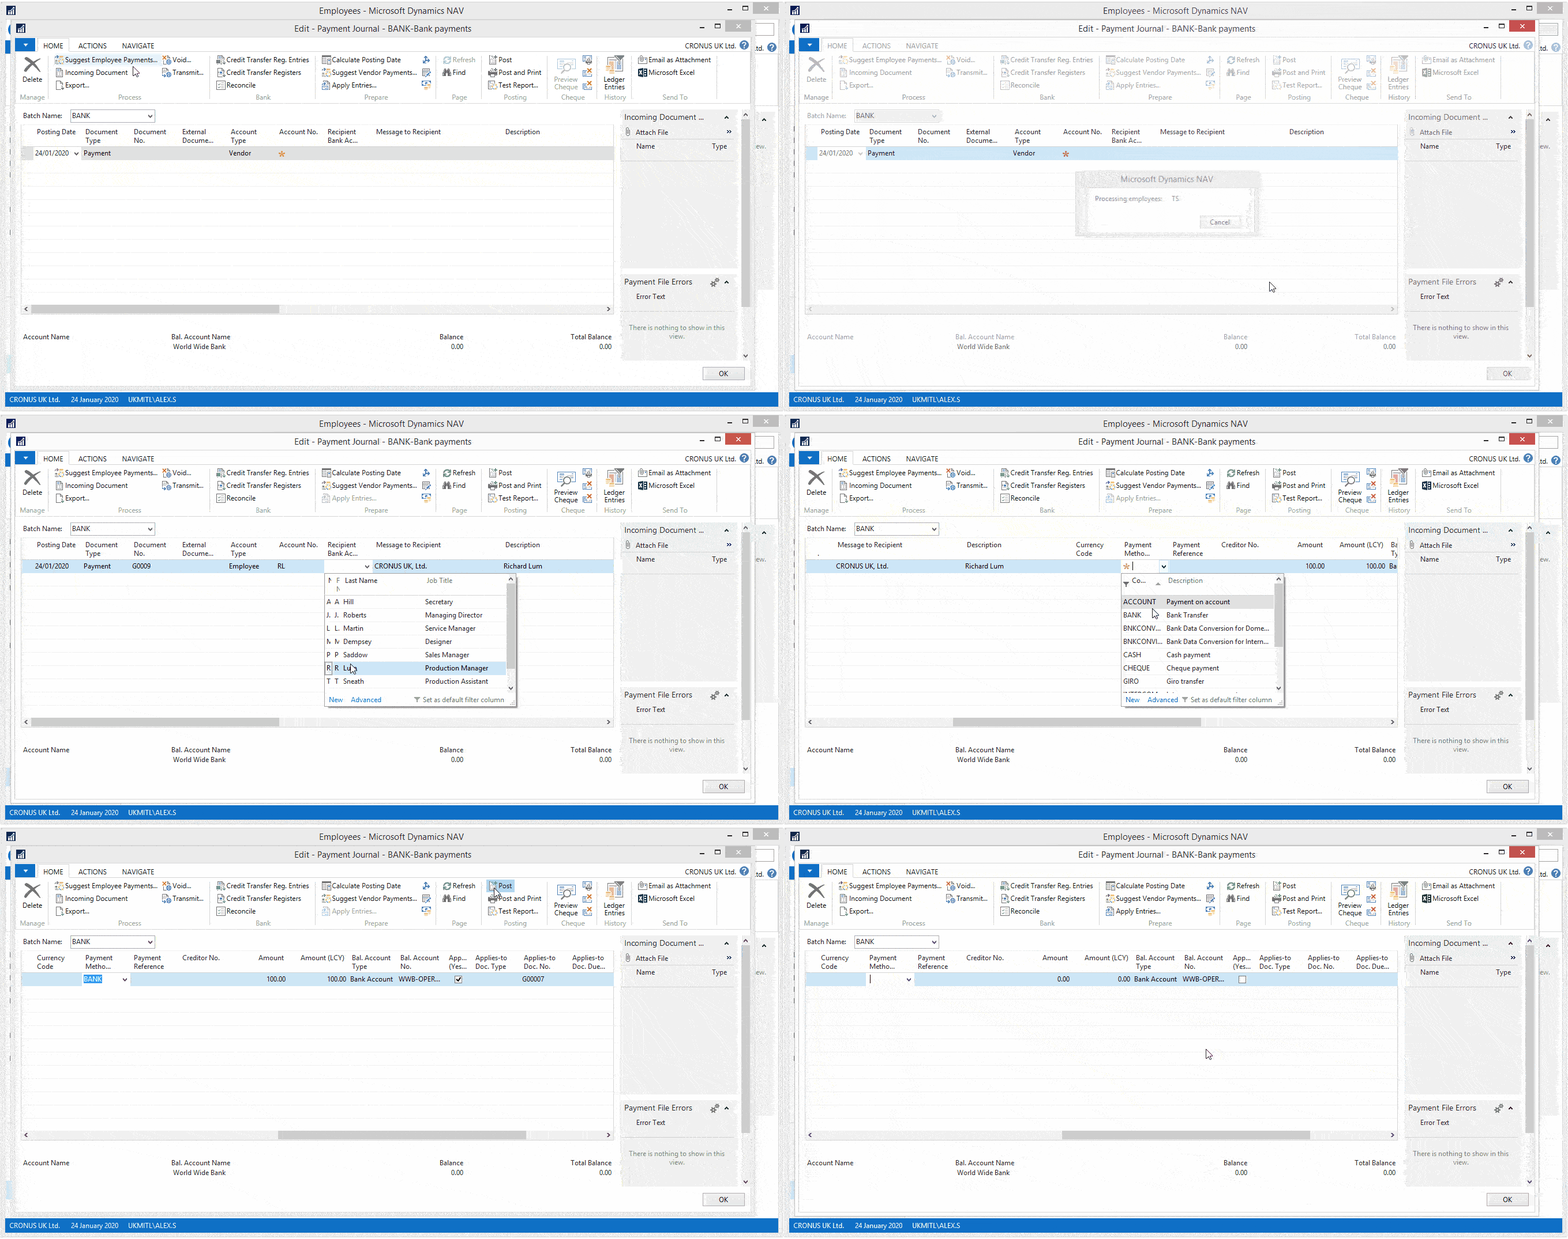
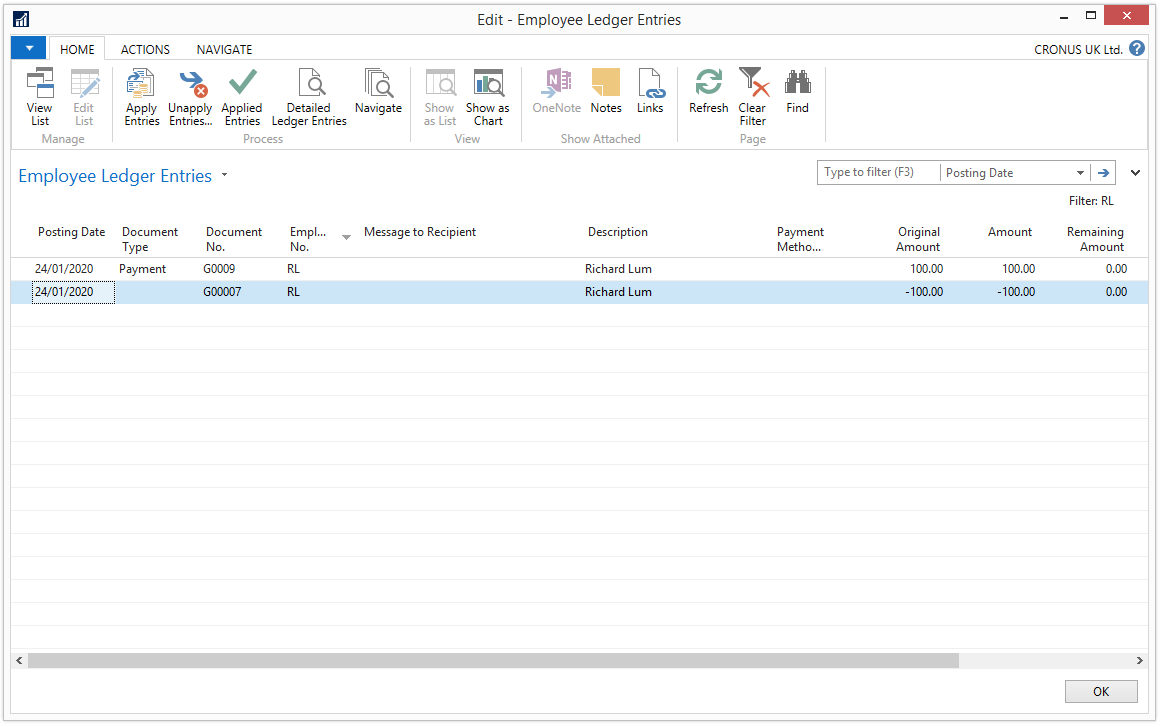
You can then go back to the employee card and check the ledger entries, where you will see that the payment has been completed and zero is shown as the remaining amount.
We hope this blog post has shown you how the new functionality in Microsoft Dynamics NAV 2018 can be used to process employee expenses. If you have any further questions, feel free to leave us a comment below. Alternatively, if you are interested in deploying a market-leading ERP solution such as Microsoft Dynamics NAV, please get in touch today.


